Plant marigold seeds for a burst of vibrant, pest-repelling flowers that brighten your garden and thrive in the sun all season long!

Planting marigold seeds is a rewarding process that allows gardeners to grow vibrant, colorful flowers with ease. Marigolds (Tagetes spp.) are known for their rapid growth and pest-repelling properties, making them a popular choice in gardens around the world. Whether you’re looking to enhance the beauty of your flower beds, improve vegetable garden health, or add a burst of color to patio containers, planting marigold seeds is simple and accessible for gardeners of all skill levels. Here’s a detailed guide on how to plant marigold seeds.
Knowing the different types of marigolds before planting them is helpful. There are three main varieties:
French Marigolds (Tagetes patula): These marigolds are compact and bushy, growing about 6-12 inches tall (sometimes up to 18 inches). They feature smaller, often multi-colored blooms in shades of yellow, orange, red, and combinations of these colors. French marigolds are ideal for borders, containers, edging, or as companion plants in vegetable gardens. They bloom continuously from spring to frost and are known for their pest-repelling abilities, especially against nematodes and aphids.
African Marigolds (Tagetes erecta): Also known as American marigolds, these are the tallest of the marigold varieties, growing up to 3-4 feet tall. They produce large, pom-pom-like flowers in vibrant shades of yellow, orange, and sometimes cream or white. African marigolds are perfect for the back of flower beds or as garden standout plants. While heat-tolerant, they are slower to bloom than French marigolds and may require more space due to their size.
Signet Marigolds (Tagetes tenuifolia): Signet marigolds are known for their delicate, lacy foliage and small, single flowers. Unlike French and African marigolds, their blooms are not pom-pom-like but rather daisy-like, in shades of yellow and orange. These marigolds are often used for edible purposes because of their citrus-like flavor, which makes them popular in salads and garnishes.
| Hardiness |
2 - 11 |
|---|---|
| Plant Type | Annuals, Perennials |
| Plant Family | Asteraceae |
| Genus | Tagetes |
| Exposure | Full Sun |
| Season of Interest | Spring (Late), Summer (Early, Mid, Late), Fall |
| Maintenance | Low |
| Water Needs | Average |
| Soil Type | Clay, Loam, Sand |
| Soil pH | Acid, Alkaline, Neutral |
| Soil Drainage | Moist but Well-Drained, Well-Drained |
| Characteristics | Cut Flowers, Fragrant, Showy |
| Tolerance | Drought, Deer, Rabbit, Clay Soil |
| Attracts | Bees, Butterflies, Birds |
| Landscaping Ideas | Beds And Borders, Edging, Patio And Containers |
| Garden Styles | City and Courtyard, Coastal Garden, Informal and Cottage |
Planting marigold seeds at the right time ensures healthy growth and abundant blooms. Marigolds are warm-weather plants that thrive in sunlight and warm soil. Here are key considerations for determining the best time to plant them:
After the Last Frost Date: Marigold seeds should be planted after the last frost of spring. Marigolds are sensitive to frost, and cold temperatures can prevent seed germination or damage seedlings. The ideal time to plant is when the soil temperature has warmed to at least 65°F (18°C). In most regions, this is around April to May, but the exact timing depends on your local climate and frost dates.
Direct Sowing Outdoors: If you’re sowing marigold seeds directly in the garden, wait until nighttime temperatures consistently remain above 50°F (10°C). Planting too early, even if daytime temperatures are warm, can result in poor germination. Marigolds generally germinate best when soil temperatures are between 70-75°F (21-24°C).
Starting Indoors: For an early start, you can plant marigold seeds indoors about 6-8 weeks before the last expected frost. Starting seeds indoors allows the plants to develop strong root systems before transplanting them outdoors. Once the seedlings are ready and the danger of frost has passed, you can harden them off and transplant them into the garden.
Summer Planting: Marigolds can also be planted in mid-summer for a late-season bloom, especially in regions with long growing seasons. Marigolds can continue to bloom in warmer climates until the first frost in fall, making them a great option for season-long color.
Marigolds thrive in full sun, so pick a sunny spot where they can receive at least 6-8 hours of sunlight per day. They can tolerate partial shade, but they bloom best and produce the most flowers when grown in full sun.
Soil Conditions: Marigolds grow in various soil types but perform best in well-draining soil. They can thrive in poor to average soils and do not need rich, fertile soil to grow well. However, if your soil is heavy clay or overly sandy, you may want to amend it with some compost to improve drainage and moisture retention.
Soil pH: The ideal soil pH for marigolds is between 6.0 and 7.0, which is slightly acidic to neutral. You can test your soil and adjust the pH if necessary using garden lime to raise it or sulfur to lower it.
Before planting your marigold seeds, it’s essential to prepare the soil properly. Here are the steps:
Remove Weeds: Clear the area of any weeds, rocks, or debris that could interfere with the growth of the marigolds.
Loosen the Soil: Use a garden fork or tiller to loosen the soil to a depth of 6-8 inches (15-20 cm). This will allow the marigold roots to grow freely.
Amend the Soil: If necessary, incorporate organic matter like compost or well-rotted manure to improve soil structure and drainage. Marigolds don’t require heavy fertilization, but a light compost mix can help ensure strong growth, especially in poor soils. Alternatively, you may want to incorporate a general-purpose fertilizer with balanced amounts of nitrogen, phosphorus, and potassium (e.g., 10-10-10 or 14-14-14) at the time of planting, particularly in poor soils where compost alone may not provide sufficient nutrients.
Smooth the Surface: Rake the soil surface to create a smooth and even planting area.
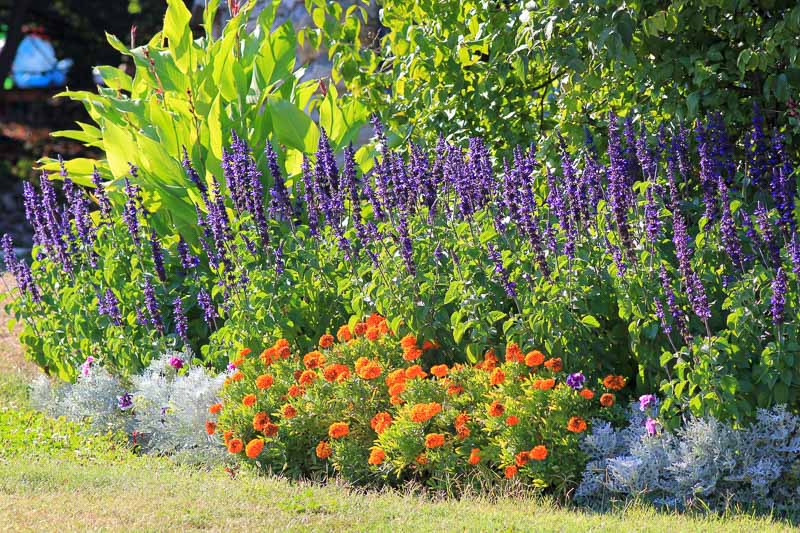
Marigold, Sage and Dusty Miller
Planting marigold seeds directly in the garden is the easiest way to grow them. Follow these steps:
Sow the Seeds: Scatter the seeds thinly over the prepared soil or plant them in rows. You can space them 1-2 inches (2-5 cm) apart for easier thinning later on. Marigold seeds are small and can be sown just beneath the soil surface.
Cover Lightly: Marigold seeds need light to germinate, so cover them lightly with a thin layer of soil, no more than 1/4 inch (0.5 cm) deep.
Water Gently: Water the soil gently but thoroughly to ensure even moisture without dislodging the seeds. You can use a fine mist nozzle on your hose or watering can to avoid disturbing the seeds.
Maintain Moisture: Keep the soil evenly moist until germination occurs, which typically takes 5-8 days depending on the temperature. Marigold seeds germinate best when soil temperatures are between 70-75°F (21-24°C).
If you prefer to start marigold seeds indoors to give them a head start, follow these steps:
Prepare Containers: Use seed trays, pots, or any container with drainage holes. Fill them with a light seed-starting mix, which is designed to provide good drainage and airflow.
Sow the Seeds: Press the marigold seeds into the surface of the soil and cover them lightly with 1/4 inch of soil.
Provide Warmth and Light: Place the containers in a warm location, ideally where the temperature stays between 70-75°F (21-24°C). Once the seeds germinate, place the seedlings under grow lights or in a sunny window where they will receive at least 6 hours of light daily.
Water: Keep the soil moist but not waterlogged. You can cover the containers with plastic wrap or a humidity dome to help retain moisture during germination.
Thinning: Once the seedlings develop two sets of true leaves, thin them out to allow for better air circulation and reduce overcrowding.
Transplanting: When the seedlings are about 2-3 inches (5-7 cm) tall and the danger of frost has passed, harden them off by gradually introducing them to outdoor conditions before transplanting them into the garden.
Once the marigold seedlings have sprouted and are a few inches tall, thin them to give each plant enough space to grow. The spacing will depend on the variety you’re planting:
French Marigolds: Space seedlings 8-10 inches (20-25 cm) apart for a fuller, bushy growth habit.
African Marigolds: These larger marigolds need more room, so space them 10-12 inches (25-30 cm) apart.
Signet Marigolds: Plant these smaller varieties 8-10 inches (20-25 cm) apart in containers or garden beds.
Thinning ensures that each marigold plant gets enough sunlight, air circulation, and nutrients to grow healthy and produce abundant blooms.
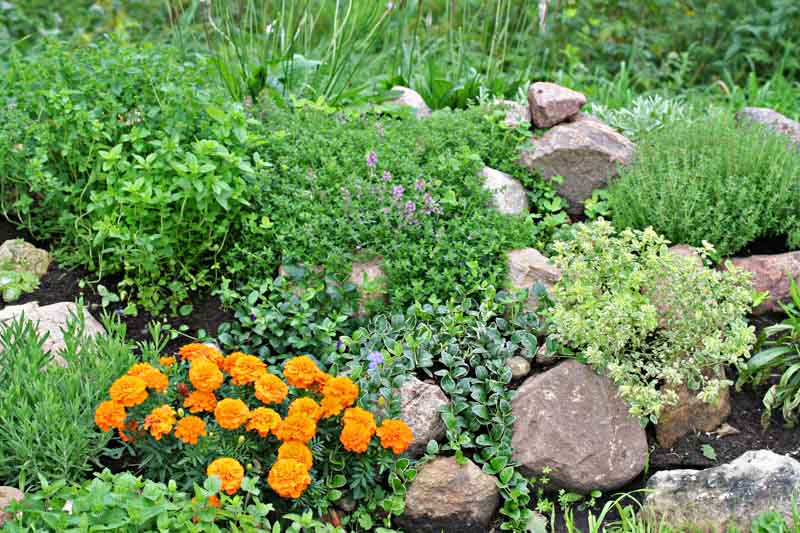 Herb Garden with Marigold, Oregano, Thyme and Lavender
Once established, marigolds are relatively drought-tolerant. However, regular watering is important to keep them blooming well throughout the season.
Watering: Water marigolds at the base of the plant to avoid wetting the foliage, which can lead to fungal diseases. Water them thoroughly when the top inch of soil feels dry, but avoid overwatering as marigolds do not like soggy soil.
Mulching: Applying a thin layer of organic mulch, such as straw or bark, around the base of the plants can help retain soil moisture and suppress weeds. Be careful not to pile the mulch directly against the stems, as this can cause rot.
Marigolds are not heavy feeders and typically thrive in average garden soil without requiring frequent fertilization. However, depending on the soil conditions and the health of your plants, some light fertilization can help enhance their growth and blooming potential.
Once marigolds are established, they generally do not require additional fertilization. However, if the plants show signs of nutrient deficiency (such as pale leaves or slow growth), a light application of fertilizer can be beneficial.
Frequency: If you choose to fertilize, do so every 4-6 weeks with a diluted, water-soluble fertilizer to promote continuous blooms without overfeeding.
Avoid Over-fertilizing: Excessive nitrogen can cause the plants to grow more leaves and fewer flowers, reducing their ornamental value. If your marigolds appear lush but are producing fewer blooms, you may be using too much fertilizer.
Marigolds are prolific bloomers, but deadheading spent flowers is essential to keep them looking their best and to encourage new blooms. Here’s how:
Deadheading: Regularly remove faded or dead flowers by pinching them off with your fingers or cutting them with garden shears. This redirects the plant’s energy into producing more flowers instead of seed production.
Pruning: If your marigolds become leggy, you can lightly trim them back to encourage bushier growth and more flower production.
Continuous Blooming: Marigolds will continue to bloom from spring until the first frost if they receive adequate sunlight, water, and deadheading.

Yes, marigold seeds can be scattered directly onto the soil, but it’s essential to lightly cover them with a thin layer of soil to ensure they make contact with the soil for proper germination. Scattering works well if you’re planting marigolds in a mass display or naturalized area, but for more controlled planting, spacing them out ensures better growth.
The best time to plant marigold seeds is after the last frost date in spring, which is typically around April to May, depending on your local climate. Marigolds need warm soil temperatures (at least 65°F/18°C) for optimal germination.
Soaking marigold seeds before planting is not necessary. They have a relatively quick germination time (usually within 5-8 days) without soaking. However, keeping the soil moist during the germination period is crucial for success.
Marigold seeds are long and thin, with one end slightly pointed and the other end looking more like a tuft. The pointed end should go into the soil, as this is where the root will emerge. However, if you’re unsure, marigold seeds will generally germinate even if not placed perfectly.
Yes, marigold seeds should be lightly covered with about 1/4 inch of soil. They need contact with soil to germinate, and the thin layer helps retain moisture and warmth while allowing light penetration.
It’s best to plant 1-2 marigold seeds per hole. If both seeds germinate, you can thin the seedlings later to ensure proper spacing and prevent overcrowding
| Hardiness |
2 - 11 |
|---|---|
| Plant Type | Annuals, Perennials |
| Plant Family | Asteraceae |
| Genus | Tagetes |
| Exposure | Full Sun |
| Season of Interest | Spring (Late), Summer (Early, Mid, Late), Fall |
| Maintenance | Low |
| Water Needs | Average |
| Soil Type | Clay, Loam, Sand |
| Soil pH | Acid, Alkaline, Neutral |
| Soil Drainage | Moist but Well-Drained, Well-Drained |
| Characteristics | Cut Flowers, Fragrant, Showy |
| Tolerance | Drought, Deer, Rabbit, Clay Soil |
| Attracts | Bees, Butterflies, Birds |
| Landscaping Ideas | Beds And Borders, Edging, Patio And Containers |
| Garden Styles | City and Courtyard, Coastal Garden, Informal and Cottage |
Create a membership account to save your garden designs and to view them on any device.
Becoming a contributing member of Gardenia is easy and can be done in just a few minutes. If you provide us with your name, email address and the payment of a modest $25 annual membership fee, you will become a full member, enabling you to design and save up to 25 of your garden design ideas.
Join now and start creating your dream garden!