Learn how to grow camellias successfully, from choosing the right site and planting depth to watering, feeding, pruning, container care, and winter protection. This practical guide also explains bud drop, yellow leaves, root rot, petal blight, common pests, propagation, and the seasonal tasks that keep camellias healthy and flowering beautifully.
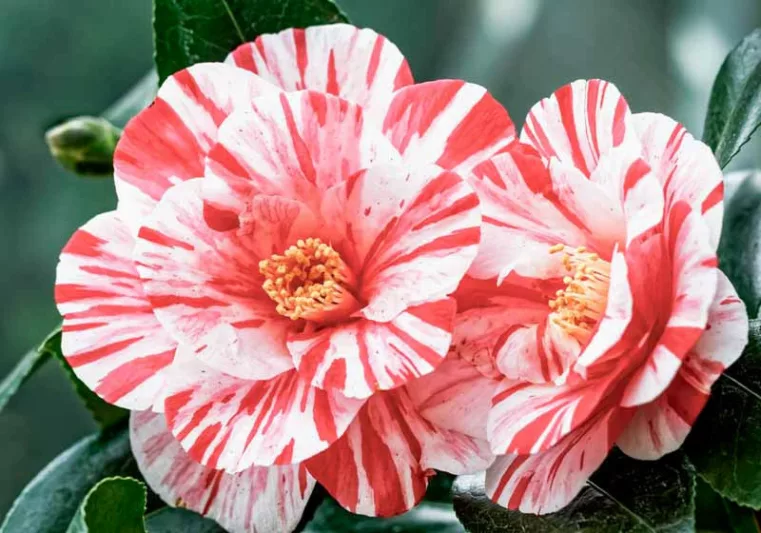


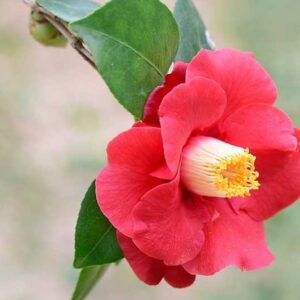
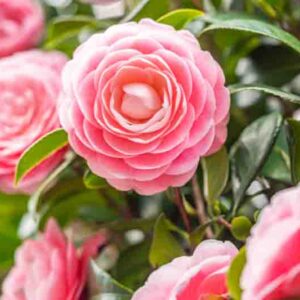
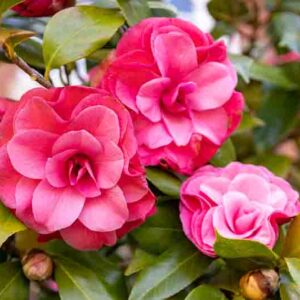
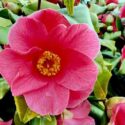
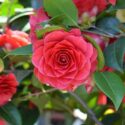
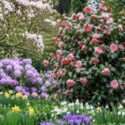
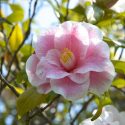
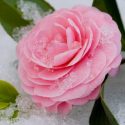
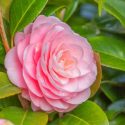
Camellias are among the most beautiful evergreen flowering shrubs, combining polished year-round foliage with exquisite white, pink, red, striped, or variegated flowers. Depending on the species and cultivar, they may bloom from fall through spring, bringing color to the garden when relatively few other shrubs are flowering.
Despite their refined appearance, camellias are not inherently difficult to grow. Most problems arise from an unsuitable site, alkaline or poorly drained soil, planting too deeply, inconsistent summer watering, or choosing a cultivar that is not hardy enough for the local climate.
Give a camellia acidic soil, good drainage, protection from environmental extremes, and steady moisture while it establishes, and it can remain attractive and floriferous for decades.
The most important rule: Never plant a camellia deeply or in waterlogged soil. Its shallow roots need both moisture and oxygen.
Successful camellia care begins before planting. Cultivars vary considerably in cold hardiness, mature dimensions, growth habit, flowering season, sun tolerance, and landscape use.
Before buying a plant, compare:
Camellia sasanqua generally flowers in fall and early winter, grows relatively quickly, and tolerates more sunlight than most japonicas. It is particularly useful for hedges, screens, espaliers, and informal borders.
Camellia japonica usually flowers from winter into spring and is prized for its large, often formal blooms. It generally prefers partial shade and shelter from harsh environmental conditions.
Camellia × williamsii hybrids often combine generous flowering, attractive evergreen foliage, and graceful growth with a midwinter-to-spring bloom season.
Explore Which Camellia Is Right for My Garden? or use the Camellia Comparison Tool to compare cultivars.
Most japonicas and many garden hybrids perform best in partial shade, dappled shade, or bright filtered light. Morning light with protection from intense afternoon sun is suitable in many climates.
Established sasanquas generally tolerate more direct sunlight, provided their roots remain cool and evenly moist. In cooler climates they may perform well in considerable sun, while plants in hot inland regions benefit from afternoon protection.
Deep shade may produce attractive foliage but fewer flowers. Excessive heat and direct afternoon sun can scorch leaves, fade flowers, and increase water stress.
About early-morning sun: Morning sunlight does not normally scorch flowers merely because they are wet with dew. The greater concern occurs during freezing weather, when rapid thawing of frozen buds and flowers can increase visible frost damage. A sheltered position helps moderate sudden temperature changes.
Choose a position protected from cold, drying winds. Winter wind can desiccate evergreen foliage, damage developing buds, and shorten the life of open flowers.
A sheltered woodland edge, courtyard, north- or east-facing wall, or location protected by taller shrubs can provide a favorable microclimate. Avoid exposed frost pockets and sites where cold air settles.
Camellias are ericaceous plants and need acidic soil. A pH of approximately 5.5-6.5 is generally favorable, although individual plants may tolerate a somewhat broader acidic range.
The ideal soil is:
Camellias do poorly in persistently wet, compacted, or poorly drained soil. They also struggle in alkaline conditions because high pH interferes with the uptake of iron and other nutrients, often causing yellow leaves with green veins.
Test the soil before planting. Where the native ground is strongly alkaline or chalky, growing a camellia in a large container filled with peat-free ericaceous potting mix is usually more reliable than repeatedly trying to acidify an entire planting bed.
Avoid planting directly beneath shallow-rooted trees that compete aggressively for moisture and nutrients. Mature maples, birches, beeches, and some conifers can create particularly dry, root-filled conditions.
Camellias appreciate overhead protection, but they still need sufficient soil volume, moisture, and light to grow and flower well.
Plant container-grown camellias in fall or spring when temperatures are moderate and the soil is workable. Fall planting allows roots to establish in still-warm soil before winter in mild climates. Spring is generally safer in colder areas because the shrub has a full growing season to establish before severe freezing weather.
Avoid planting during:
A camellia can be planted while flowering, but bloom is not a requirement and should not be considered the universally best planting time. Weather, soil conditions, and the plant’s ability to establish roots are more important.
Avoid the “bathtub effect.” A hole filled with heavily amended material can retain water differently from the surrounding soil. In heavy ground, improve drainage across a wider area or plant on a raised mound rather than creating a deep amended pocket.
Newly planted camellias need consistent moisture while their root systems expand into the surrounding soil. Depending on climate, soil, and planting season, close attention may be needed for at least the first year and often longer.
Water deeply enough to moisten the root zone, then allow excess water to drain. Frequent shallow sprinkling encourages roots to remain near the surface and does not protect the plant during hot or dry periods.
Summer moisture is especially important because camellias are developing flower buds for the following fall, winter, or spring. Drought during bud formation can contribute to:
Established plants may tolerate short dry periods, but they should not be allowed to remain severely dry for long periods.
Rainwater is particularly suitable for camellias. In regions with very hard or alkaline tap water, repeated watering may gradually raise the pH of container compost and contribute to nutrient deficiencies.
Never use water from a domestic salt-based water softener on camellias or other garden plants.
Apply a 2-3 inch (5-7 cm) layer of organic mulch over the root zone. Suitable materials include:
Mulch helps conserve soil moisture, suppress weeds, moderate root-zone temperatures, and gradually add organic matter.
Keep mulch several inches away from the trunk. Deep mulch piled around the crown can retain excessive moisture, hide decay, and encourage stem or root problems.
Because camellias have shallow roots, avoid digging, hoeing, or cultivating deeply beneath the canopy.
Camellias growing in fertile, organically rich soil may flower well with little supplemental fertilizer. Plants in containers or nutrient-poor soils may need regular but moderate feeding.
Where feeding is necessary:
Avoid excessive nitrogen. Overfeeding can scorch roots, promote soft growth, increase susceptibility to stress, and reduce flowering. Late-summer fertilizer may stimulate tender growth or contribute to bud problems in some climates.
A soil test is the best guide when leaves suggest a deficiency. Yellow foliage is not always evidence that the plant simply needs more fertilizer; alkaline soil, damaged roots, waterlogging, drought, or disease may prevent nutrient uptake.
Most camellias naturally develop attractive frameworks and require little routine pruning. Pruning may be useful to:
Prune soon after flowering. This gives the plant time to produce new shoots and develop the buds that will flower during the following season.
Late pruning may remove already formed flower buds. The precise timing therefore depends on whether the cultivar blooms in fall, winter, or spring.
Do not assume that every camellia responds identically to severe pruning. Many established japonicas and sasanquas regenerate successfully, but recovery varies with species, cultivar, age, vigor, climate, and the condition of the root system.
See When and How to Prune Camellias Correctly for detailed instructions on routine pruning, renovation, hedges, and espaliers.
Deadheading is not necessary for the health of most camellias, but removing faded flowers can improve the shrub’s appearance and reduce the amount of decaying floral material around the plant.
Where camellia petal blight is present, sanitation becomes especially important. Remove affected flowers from the shrub and collect fallen blooms from beneath it rather than allowing infected petals to remain in place.
Camellias are excellent container plants and are especially valuable where garden soil is alkaline, compacted, contaminated, or poorly drained.
Container-grown plants dry more quickly than camellias in the ground. Check them frequently during warm, windy, or dry weather, even when rainfall has occurred, because dense foliage may prevent rain from adequately wetting the potting mix.
| Hardiness |
6 - 9 |
|---|---|
| Plant Type | Shrubs |
| Genus | Camellia |
| Exposure | Partial Sun, Shade |
| Season of Interest | Spring (Early, Mid, Late), Fall, Winter |
| Soil Type | Clay, Loam, Sand |
| Soil pH | Acid, Neutral |
| Soil Drainage | Moist but Well-Drained, Well-Drained |
A camellia may be hardy enough to survive winter while its flower buds and open blooms remain vulnerable to frost. Plant survival and flower survival are not the same thing.
To reduce winter damage:
Explore Cold-Hardy Camellias for cultivars suited to colder gardens.
A small amount of natural bud shedding can occur when a plant has produced more buds than it can support. Heavy or repeated bud drop, however, usually indicates environmental stress.
Common causes include:
Container-grown plants positioned beneath roof overhangs may receive little natural rainfall. Move them into open rain or water them directly throughout summer and fall.
For a complete diagnosis, see Why Is My Camellia Not Blooming? 10 Causes and Solutions.
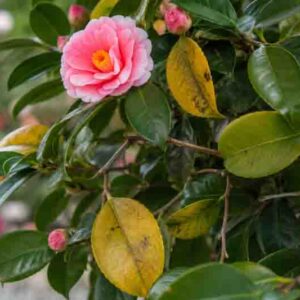
Yellow leaves are a symptom rather than a single disease. The pattern of yellowing provides useful clues.
Do not automatically apply fertilizer or iron without determining the cause. A plant with damaged or waterlogged roots may be unable to absorb nutrients even when they are present in the soil.
See Camellia Leaves Turning Yellow: Causes and Fixes.
Healthy, correctly sited camellias are relatively resilient, but they may be affected by several sap-feeding or root-feeding pests.
Inspect both sides of the leaves regularly. Correct identification matters because treatments differ by pest, life stage, climate, and local pesticide regulations.
Phytophthora root rot is among the most destructive camellia diseases. Affected plants may develop dull, yellowing foliage, weak growth, wilting, branch dieback, and dark, decayed roots.
The disease is strongly favored by poorly drained, saturated soil. Prevention is far more reliable than attempting to rescue a severely affected plant.
Reduce risk by:
Do not rely on a general copper fungicide as a cure. Root decline may also result from waterlogging, honey fungus, physical damage, or other causes, so an accurate diagnosis is important before treatment.
Camellia petal blight causes expanding brown or rust-colored spots on flowers. Infected blooms may collapse quickly, while the foliage usually remains unaffected.
Remove affected flowers from the plant and collect fallen blooms from the soil. Dispose of them rather than composting them. Replacing contaminated surface mulch may reduce the amount of infected debris around valuable plants.
Because the disease cycle and permitted treatments vary regionally, seek advice from a local extension service or plant-health professional where petal blight is persistent.
Camellia canker and dieback can cause leaves on individual branches to wilt, yellow, and die. Sunken or discolored areas may appear on stems.
Prune infected branches back into healthy wood during dry weather, sanitize tools between cuts, and reduce stresses such as poor drainage, bark injury, or drought.
Camellia leaf gall causes young leaves or shoots to become thickened, distorted, and pale green, pink, or white. Remove affected tissue before the surface becomes white and releases spores.
Various fungi can produce brown or black leaf spots. Sooty mold forms a dark surface coating on honeydew excreted by aphids, scale insects, or other sap feeders. Treat the underlying pest rather than attempting to control the harmless surface mold alone.
See Camellia Diseases and Pests: Symptoms and Treatment for detailed identification guidance.
Camellias can be propagated by cuttings, layering, grafting, and seed. Seed-grown plants may differ greatly from the parent and often take years to flower, so vegetative methods are preferred for preserving a named cultivar.
Take semi-ripe cuttings from firm current-season growth, usually from summer into early fall. Remove the lower leaves, lightly wound the base if appropriate, apply rooting hormone, and insert the cutting into a clean, free-draining propagation medium.
Maintain humidity without saturating the growing medium. Rooting can be slow and success varies considerably among cultivars.
Layering is one of the simplest methods for home gardeners:
Grafting is widely used by specialists to propagate difficult-to-root cultivars, rare selections, and some large-flowered hybrids. It requires suitable rootstock, careful technique, and controlled aftercare.
| Season | Main Camellia Tasks |
|---|---|
| Fall | Plant in mild climates, maintain moisture, inspect developing buds, protect exposed plants from wind, and enjoy early sasanqua flowers. |
| Winter | Protect flowers and containers during severe cold, collect fallen diseased blooms, avoid waterlogging, and enjoy winter-flowering cultivars. |
| Spring | Plant in colder climates, prune after flowering, renew mulch, feed if required, and inspect young shoots for aphids and scale crawlers. |
| Summer | Water deeply during dry weather, protect roots with mulch, monitor containers closely, avoid late heavy feeding, and remember that next season’s flower buds are developing. |
Camellias are not difficult plants when their fundamental needs are met. Success depends on choosing a suitable cultivar, planting it shallowly in acidic well-drained soil, providing shelter from environmental extremes, and maintaining consistent moisture during establishment and summer bud development.
Once established, most camellias require relatively little intervention. Thoughtful watering, moderate feeding where needed, light pruning after flowering, and regular inspection for pests or disease are usually sufficient to maintain healthy evergreen foliage and dependable seasonal bloom.
No. Camellias are generally reliable, long-lived shrubs when planted in acidic, well-drained soil with appropriate light and consistent moisture. Most serious problems result from poor drainage, alkaline conditions, deep planting, drought, or an unsuitable climate.
Plant camellias in fall or spring when temperatures are moderate. Fall is suitable in mild climates, while spring gives plants in colder areas more time to establish before winter.
Most japonicas and many hybrids prefer partial shade or bright filtered light. Established sasanquas tolerate more sun, especially in cooler climates, provided their roots remain evenly moist.
A soil pH of approximately 5.5-6.5 is generally favorable. Alkaline soil can interfere with nutrient uptake and cause yellow leaves with green veins.
Water according to soil conditions rather than a fixed schedule. Newly planted camellias need regular deep watering, while established plants require supplemental water during prolonged dry periods, especially in summer when flower buds are developing.
Camellias growing in fertile soil may need little fertilizer. Where feeding is necessary, use a product formulated for acid-loving plants during spring or early summer and follow the label carefully. Avoid overfeeding.
Prune shortly after flowering. Camellias form subsequent flower buds on new growth, so pruning too late can remove the buds responsible for the next display.
Common causes include summer drought, irregular watering, root damage, waterlogging, frost, cold wind, excessive fertilizer, container stress, or natural thinning when the plant has formed more buds than it can support.
Yes. Use a container with good drainage, peat-free ericaceous potting mix, and a cultivar suited to the available space. Container-grown camellias need close attention to watering and protection from extreme temperatures.
Possible causes include alkaline soil, iron or nitrogen deficiency, waterlogging, drought, damaged roots, root rot, scale insects, or natural aging. Identify the yellowing pattern and inspect the roots and leaf undersides before treating the plant.
Updated: May 2026 • Reviewed by Gardenia Editors
123rf
| Hardiness |
6 - 9 |
|---|---|
| Plant Type | Shrubs |
| Genus | Camellia |
| Exposure | Partial Sun, Shade |
| Season of Interest | Spring (Early, Mid, Late), Fall, Winter |
| Soil Type | Clay, Loam, Sand |
| Soil pH | Acid, Neutral |
| Soil Drainage | Moist but Well-Drained, Well-Drained |
Create a membership account to save your garden designs and to view them on any device.
Becoming a contributing member of Gardenia is easy and can be done in just a few minutes. If you provide us with your name, email address and the payment of a modest $25 annual membership fee, you will become a full member, enabling you to design and save up to 25 of your garden design ideas.
Join now and start creating your dream garden!
Create a membership account to save your garden designs and to view them on any device.
Becoming a contributing member of Gardenia is easy and can be done in just a few minutes. If you provide us with your name, email address and the payment of a modest $25 annual membership fee, you will become a full member, enabling you to design and save up to 25 of your garden design ideas.
Join now and start creating your dream garden!