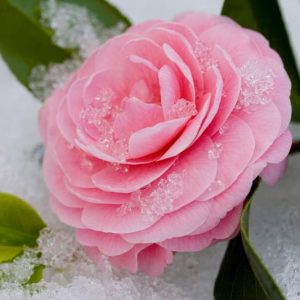
Prune a camellia at the wrong time and you may remove next year’s flowers. This visual guide explains the best timing by bloom season, correct pruning cuts, safe size reduction, renovation, hedges, espaliers, deadheading, and aftercare. Control overgrown plants while preserving their graceful shape and future floral display.
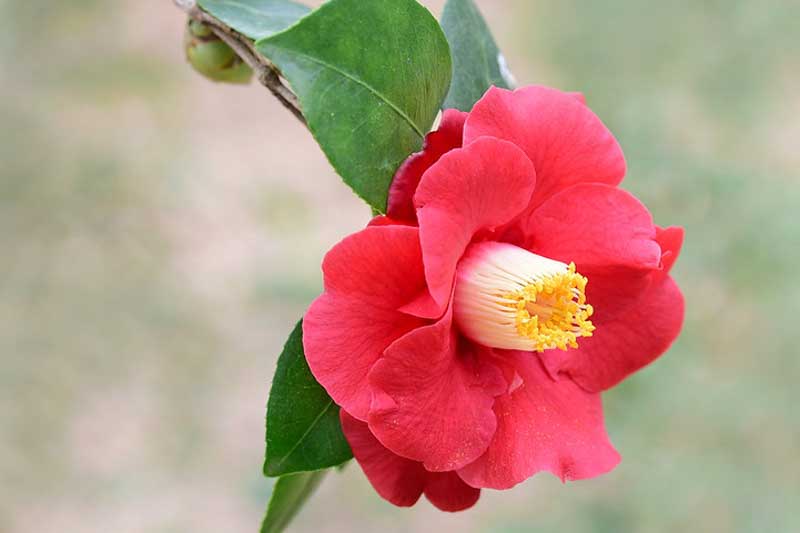


Camellias naturally develop graceful, densely branched forms and rarely require heavy annual pruning. Most established plants need little more than the removal of dead, damaged, diseased, crossing, or disproportionately long branches.
Pruning becomes more challenging when a camellia outgrows its space, blocks a path or window, develops a bare interior, or has been repeatedly clipped into a dense outer shell. Gardeners often postpone the work because they are afraid of cutting off the following season’s flowers.
The key is timing. Most ornamental camellias flower on shoots produced during the previous growing season. Pruning soon after flowering gives the shrub time to produce and mature new growth before the next crop of flower buds develops. Pruning in late summer, fall, or winter may physically remove buds that would otherwise open during the following flowering season.
This guide explains the best pruning time for fall-, winter-, and spring-flowering camellias, how to make correct cuts, how to reduce an overgrown shrub, and how to maintain camellia hedges and espaliers while preserving as many future flowers as possible.
For routine shaping, prune immediately after the main floral display ends. This removes the fewest future flower buds and leaves the longest possible growing season for replacement shoots to develop and mature.
Avoid unnecessary late pruning. Once rounded flower buds are visible, restrict cutting to dead, broken, diseased, or dangerous branches unless size reduction cannot wait.
| Flowering Season | Typical Camellias | Best Routine Pruning Window | Main Risk of Waiting |
|---|---|---|---|
| Fall to early winter | Camellia sasanqua, C. hiemalis, and early hybrids | As the main floral display finishes, generally from late fall through winter | Delayed pruning shortens the time available for replacement growth to mature |
| Winter | Winter-flowering japonicas and hybrids | Late winter or early spring after flowering | Later cuts may remove new shoots on which future buds will develop |
| Late winter to spring | Camellia japonica, C. × williamsii, and many late hybrids | Immediately after the last major flush of flowers fades | Late summer through winter pruning may remove the next season’s flower buds |
| Long or irregular flowering season | Cultivars blooming intermittently over several months | Prune when the main display ends, even if a few scattered flowers remain | Waiting for every final flower can leave too little time for replacement growth |
Bloom dates vary with cultivar, climate, exposure, and seasonal weather. Use the plant’s own flowering cycle rather than relying on one universal calendar date. Gardenia’s guides to fall-blooming camellias, winter-blooming camellias, and spring-blooming camellias can help identify the usual flowering season.
After flowering, a camellia produces new leafy shoots. As this growth matures, flower buds begin developing for the next bloom season. By late summer or fall, the buds on many spring-flowering camellias are already present, although they may not open for several more months.
Cutting those stems later in the year removes the developing flowers along with the branches. The plant may still produce healthy foliage the following spring, creating the impression that it has mysteriously stopped blooming.
Flower buds are usually plumper and rounder than narrow, pointed leaf buds. Learning to recognize the difference helps prevent accidental removal when a small corrective cut becomes necessary outside the ideal pruning season.
Look before cutting: When rounded flower buds are already visible, postpone cosmetic shaping until after flowering. Remove only wood that is dead, broken, diseased, dangerous, or causing an urgent obstruction.
No. A healthy, well-sited camellia can retain an attractive natural outline for many years with little intervention. Regular shearing is unnecessary and may gradually make the plant less attractive by producing dense growth around the exterior and a shaded, leafless interior.
Prune for a specific reason rather than simply because other shrubs are being pruned. Appropriate reasons include:
Light shaping preserves the existing framework. It involves shortening a few long shoots, thinning selected congested branches, and correcting growth that spoils the shrub’s outline.
Remove only what is necessary. Light, selective pruning is easier for the shrub to replace and less likely to trigger excessive coarse regrowth than a drastic all-at-once reduction.
Trace an overly long shoot into the canopy and shorten it to a healthy outward-growing side branch, leaf node, or growth bud.
Vary the depth of the cuts so the shrub retains a natural, layered outline rather than developing a rigid outer shell.
Renovation pruning is used when a camellia has grown far beyond its allotted space, become bare at the base, developed a badly congested interior, or suffered years of indiscriminate shearing.
Many established camellias can regrow from old wood and tolerate substantial pruning. However, the harder the plant is cut, the longer it may take to rebuild a flowering canopy. A severely reduced camellia may produce few flowers for two years or longer.
Gradual renovation is generally the least disruptive approach. Reduce the plant over two or three flowering cycles, shortening selected limbs and removing some of the oldest or most awkward growth while retaining a balanced framework and ample foliage.
Expect fewer flowers after renovation. A hard-pruned camellia redirects energy into shoots and leaves. Losing one or more bloom seasons is a normal consequence of drastic size reduction, not necessarily evidence that the plant has been permanently damaged.
Routine shaping and severe renovation are not always timed in exactly the same way.
Routine shaping is best completed immediately after flowering because preserving the next crop of flower buds is the main priority.
Drastic framework renovation is often undertaken in late winter or early spring in mild climates, when the plant is approaching active growth and has the entire growing season to produce replacement shoots. RHS guidance recommends March for hard pruning, while warning that good flowering may not return for several years.
A spring-flowering camellia can often be renovated immediately after bloom, which may coincide naturally with this period. A fall-flowering sasanqua may finish during winter; where severe cutting is planned, waiting until the danger of damaging freezes has eased may be safer than hard-pruning immediately after its final flower.
Flowers or framework? Severe renovation prioritizes the plant’s future size and structure over its immediate floral display. Do not postpone urgently needed structural work solely to preserve one season of flowers.
First season: Remove dead wood, correct serious defects, and selectively reduce the tallest or widest limbs.
Second season: Shorten additional oversized branches and thin crowded regrowth.
Third season: Complete the size reduction and begin maintaining the new outline with light post-flowering pruning.
Recently planted, drought-stressed, root-damaged, diseased, or generally weak camellias should be pruned more conservatively. Correct drainage, moisture, or root-health problems before attempting major renovation.
Dead branches can be removed at any time because they carry no viable flower buds. To check a small stem, lightly scrape a tiny area of bark. Moist green or pale tissue beneath indicates that the stem is alive; dry brown tissue suggests that it is dead.
Cut dead wood back to living tissue, a healthy side branch, or the branch collar where the limb joins a larger stem.
Remove torn and hanging branches promptly. Make a clean cut below the damaged area rather than leaving shredded bark or a splintered stub.
Where two branches rub, retain the one with the stronger attachment, healthier growth, and better direction. Remove the weaker, damaged, inward-growing, or less useful branch.
When removing branches affected by canker or dieback, cut below visible discoloration and into healthy wood. Clean pruning blades between diseased cuts and dispose of infected material rather than leaving it beneath the shrub.
Camellias respond best to deliberate reduction and thinning cuts rather than indiscriminate chopping.
A reduction cut shortens a large limb to a suitably positioned side branch. The retained lateral should be substantial enough to assume the terminal role and continue the natural line of growth. Cutting a heavy limb back to a tiny twig does not create a strong new leader.
Small shoots may be shortened just above an outward-facing leaf node or growth bud. Leave enough stem to avoid damaging the bud, but not so much that a dead stub remains.
A thinning cut removes an entire shoot or branch at its point of origin. Use it to eliminate crossing, crowded, inward-growing, or poorly positioned growth without stimulating a cluster of shoots at the cut end.
When removing a whole branch, cut immediately outside the swollen branch collar. Do not leave a long stub, but do not cut flush against the trunk or parent limb.
Cut above a strong lateral
The shoot extends beyond the desired outline. The planned cut is immediately beyond a healthy, outward-growing side branch large enough to become the new tip.
Lateral becomes the new tip
The retained side branch continues the stem’s natural line. No bare stub or blunt, club-like end remains.
| Cut | Likely Result | Why It Matters |
|---|---|---|
| Correct reduction cut Cut back to a substantial, healthy side branch. |
Natural outline and orderly continuation of growth | The lateral branch assumes the terminal role. |
| Correct node cut Cut just above an outward-facing bud or leaf node. |
New growth develops in the selected direction | A short, clean cut avoids leaving a dead stub. |
| Correct thinning cut Remove an unwanted shoot at its point of origin. |
Less congestion without a tuft of new shoots | The plant retains a layered, open framework. |
| Incorrect stub cut A long branch end remains beyond a bud or side branch. |
Dead stub and poor wound closure | The unsupported end cannot continue normal growth. |
| Repeated shearing Every stem is cut at the same outer plane. |
Dense exterior and increasingly bare interior | The outer shell blocks light and hides the shrub’s natural form. |
Camellias make attractive evergreen screens and informal hedges. Camellia sasanqua is especially suitable because many cultivars are vigorous, flexible, relatively sun-tolerant once established, and responsive to shaping.
For a flowering camellia hedge:
A formal hedge can be clipped, but frequent shearing removes shoot tips and may also remove developing flower buds. If small summer extensions must be shortened, stop once rounded flower buds become visible.
Flowering versus form: The more frequently a camellia is clipped into a precise geometric shape, the more likely it is to produce fewer flowers. An informal hedge generally blooms more freely.
An espaliered camellia requires regular selective pruning to preserve its permanent framework and keep new growth close to the wall, fence, or support.
Gardenia’s guide to espaliering a camellia explains how to establish and train the original framework.
RHS places wall-trained camellias in pruning group 13 and recommends shortening side shoots to two to four buds while removing shoots growing toward the wall. :contentReference[oaicite:1]{index=1}
Deadheading is not required to make most camellias bloom again. Spent flowers naturally fall or gradually detach, and many Camellia × williamsii cultivars shed faded blooms particularly cleanly.
Removing spent flowers can still be helpful when:
Deadheading is primarily an appearance and sanitation task, not a requirement for future flowering. Where petal blight is present, collect fallen flowers from beneath the shrub rather than removing only those that remain attached.
There is no universal percentage suitable for every camellia. The appropriate amount depends on plant age, vigor, root health, recent weather, cultivar, and the reason for pruning.
Prune weak, newly planted, drought-stressed, root-damaged, or diseased plants conservatively. A vigorous, well-established specimen can tolerate substantially more intervention than a plant already struggling to support its canopy.
Use sharp tools that produce clean cuts without crushing or tearing bark. Support heavy branches as they are removed so their weight does not strip bark from the remaining stem.
Large limbs are safest to remove in stages. Shorten the branch first to reduce its weight, then make the final cut immediately outside the branch collar.
Water during dry weather so the shallow root system can support new shoots, but do not keep the soil saturated. Apply organic mulch over the root zone while leaving a clear space around the trunk.
Avoid forcing an explosion of soft growth with excessive fertilizer. Where feeding is needed, use an appropriate fertilizer for acid-loving plants at the recommended rate.
Watch the camellia’s response through spring and summer. Remove only clearly unwanted shoots, and stop cosmetic trimming once flower buds become visible.
Gardenia’s guide to planting, caring for, and growing camellias explains their soil, watering, mulching, and feeding requirements.
Before every cut, decide whether the branch is dead, defective, misplaced, or merely inconvenient. Dead and diseased wood should go. A healthy flowering branch should remain unless removing it serves a clear structural or size-control purpose.
Camellias recover from pruning, but flower buds cannot be reattached. When uncertain, prune less, observe the plant for another season, and continue immediately after the next bloom.
Camellias need less pruning than many flowering shrubs. Routine shaping is best completed as the flowers fade and before the next season’s buds are well developed. The exact month depends on whether the cultivar flowers in fall, winter, or spring.
Use selective reduction and thinning cuts rather than indiscriminate shearing. Remove dead, damaged, crossing, and diseased wood cleanly, and renovate an oversized specimen over several seasons where practical.
Severe renovation is a different operation from routine shaping. It may be safest in late winter or early spring and will often sacrifice flowers while the plant rebuilds its framework.
Hedges and espaliers require more regular attention than specimen shrubs, but both flower best when major cutting is completed after bloom and late-season clipping is minimized. Deadheading remains optional except where sanitation is needed to remove diseased floral debris.
For routine shaping, prune immediately after the camellia’s main flowering display ends. Fall-flowering camellias are pruned after their fall or winter bloom, while spring-flowering camellias are pruned in spring after the flowers fade.
Most ornamental camellias flower on growth produced during the previous season. By late summer or fall, flower buds may already be developing. Pruning those stems removes the buds that would have opened during the following bloom season.
Many established camellias tolerate hard pruning and can regrow from older wood. However, severe pruning may reduce flowering for two years or longer. Gradual renovation over two or three seasons is generally less disruptive.
For routine shaping, remove only branches that spoil the outline and keep live-canopy removal modest. Spread major reduction across several seasons where practical, especially on stressed plants, recently planted camellias, and valuable cultivars.
Camellias can be sheared, but repeated shearing creates dense outer growth, shades the interior, and removes shoot tips that could carry flowers. Selective hand pruning usually preserves a more natural shape and better flowering.
Deadheading is not necessary for most camellias to flower again. Remove spent blooms for appearance or sanitation, particularly where camellia petal blight is present and fallen infected flowers need to be collected.
Yes. Dead, broken, dangerous, and clearly diseased branches may be removed whenever necessary because dead wood carries no viable flower buds. Postpone nonessential shaping until immediately after flowering.
After flowering, retain the permanent framework, tie useful young shoots to the support, shorten side shoots to two to four buds, and remove growth projecting toward or away from the wall.
Updated: July 2026 • Reviewed by Gardenia Editors
| Hardiness |
6 - 9 |
|---|---|
| Heat Zones |
7 - 8 |
| Climate Zones | 4, 5, 6, 7, 8, 9, 12, 14, 15, 16, 17, 18, 19, 20, 21, 22, 23, 24 |
| Plant Type | Shrubs |
| Plant Family | Theaceae |
| Genus | Camellia |
| Exposure | Full Sun, Partial Sun, Shade |
| Season of Interest | Spring (Early, Mid), Fall, Winter |
| Maintenance | Low |
| Water Needs | Average |
| Soil Type | Clay, Loam, Sand |
| Soil pH | Acid, Neutral |
| Soil Drainage | Moist but Well-Drained, Well-Drained |
| Characteristics | Cut Flowers, Fragrant, Plant of Merit, Showy |
| Landscaping Ideas | Beds And Borders, Hedges And Screens, Patio And Containers, Wall-Side Borders |
| Garden Styles | City and Courtyard, Informal and Cottage, Japanese Garden, Traditional Garden |
| Hardiness |
6 - 9 |
|---|---|
| Heat Zones |
7 - 8 |
| Climate Zones | 4, 5, 6, 7, 8, 9, 12, 14, 15, 16, 17, 18, 19, 20, 21, 22, 23, 24 |
| Plant Type | Shrubs |
| Plant Family | Theaceae |
| Genus | Camellia |
| Exposure | Full Sun, Partial Sun, Shade |
| Season of Interest | Spring (Early, Mid), Fall, Winter |
| Maintenance | Low |
| Water Needs | Average |
| Soil Type | Clay, Loam, Sand |
| Soil pH | Acid, Neutral |
| Soil Drainage | Moist but Well-Drained, Well-Drained |
| Characteristics | Cut Flowers, Fragrant, Plant of Merit, Showy |
| Landscaping Ideas | Beds And Borders, Hedges And Screens, Patio And Containers, Wall-Side Borders |
| Garden Styles | City and Courtyard, Informal and Cottage, Japanese Garden, Traditional Garden |
Create a membership account to save your garden designs and to view them on any device.
Becoming a contributing member of Gardenia is easy and can be done in just a few minutes. If you provide us with your name, email address and the payment of a modest $25 annual membership fee, you will become a full member, enabling you to design and save up to 25 of your garden design ideas.
Join now and start creating your dream garden!
Create a membership account to save your garden designs and to view them on any device.
Becoming a contributing member of Gardenia is easy and can be done in just a few minutes. If you provide us with your name, email address and the payment of a modest $25 annual membership fee, you will become a full member, enabling you to design and save up to 25 of your garden design ideas.
Join now and start creating your dream garden!