Finished flowers, bare scapes, and green daylily leaves should not all be treated alike. Learn exactly what to remove after bloom, when to cut flower stalks, why healthy foliage usually stays, and when fall cleanup makes sense. Gardenia's simple four-step rule takes the guesswork out of daylily pruning.
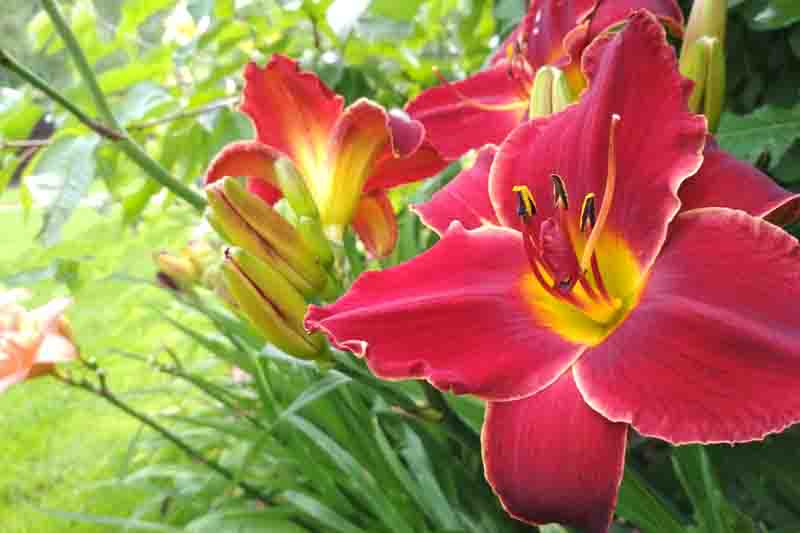


Daylilies finish flowering in stages, which is exactly why the question “When should I cut back my daylilies?” causes so much confusion. A faded flower, an empty flower stalk, and a fan of healthy green leaves are three different parts of the plant, and they should not all be removed at the same time.
The simplest rule is this: deadhead spent flowers during bloom, remove a flower scape when all its buds and flowers are finished, and leave healthy green foliage in place until it naturally declines or you have a specific reason to shorten it.
That distinction matters. Cutting a bare flower stalk improves the plant’s appearance without removing meaningful leaf area. Cutting an entire healthy fan of leaves after flowering is a much more drastic intervention and is usually unnecessary for routine maintenance.
This guide explains exactly what to cut, what to leave, and when to do it, from the first faded flower through winter cleanup and spring renewal. For complete planting, watering, feeding, dividing, and year-round cultivation advice, see Gardenia’s How to Grow and Care for Daylilies: Complete Planting & Care Guide.
Flower Off → Scape Down → Foliage On → Clean Up Late
| Plant Part | When to Remove It | What to Do |
|---|---|---|
| Spent flower | After it fades | Flower Off: snap or snip off the faded bloom if desired |
| Finished scape | After every flower and bud on that scape is finished | Scape Down: cut the bare flower stalk close to the base |
| Healthy green foliage | Usually leave it while actively growing | Foliage On: do not routinely shear the whole plant after bloom |
| Dead or declining foliage | Fall after dieback, or before new growth in spring | Clean Up Late: remove dead material and old debris |
The important distinction: a finished flower is not the same as a finished scape, and a finished scape is not the same as finished foliage. Treat each part according to what it is doing.
Before reaching for pruners, identify the plant part in front of you. Much of the conflicting advice about “cutting back daylilies” comes from using one phrase for several completely different jobs.
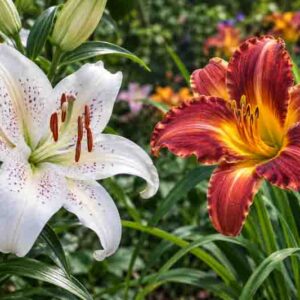
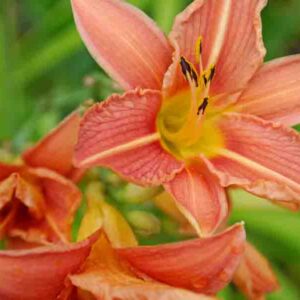
Each individual daylily flower normally lasts only about one day. A faded blossom quickly collapses while other buds on the same stalk continue opening. Removing that spent flower is deadheading.
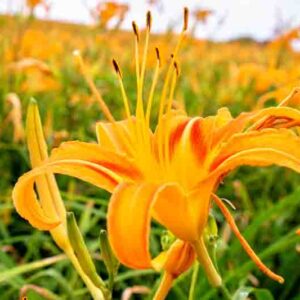
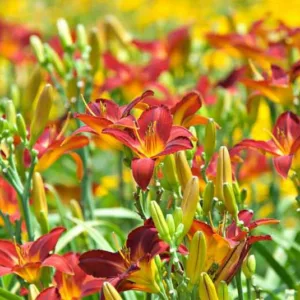
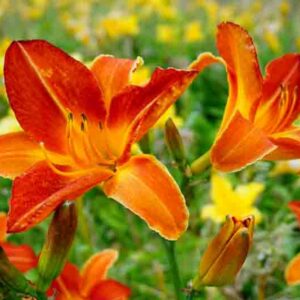
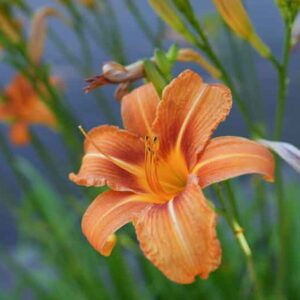
The scape is the leafless flowering stalk that rises from the fan of leaves and carries buds and flowers. A scape may continue flowering long after its first blossom fades because its buds open in succession.
Do not cut down a scape just because one flower has finished. Wait until all buds and flowers on that scape are done. Once the stalk is truly finished, it can be cut close to the base.
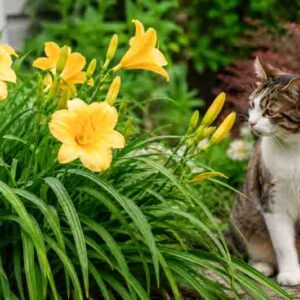
Daylily foliage consists of the arching, strap-shaped leaves that emerge in fans from the crown. These leaves are independent of the flower scape and may remain green and active long after flowering has ended.
The most common mistake: Cutting the flowers, flower scapes, and foliage to the ground at the same time simply because flowering has ended. Those three plant parts are at different stages of their life cycle.
Deadheading means removing individual spent flowers and, if they develop, unwanted seed pods. It is optional for survival, but it keeps a daylily clump looking considerably cleaner during its flowering season.
To deadhead, gently snap or snip off the collapsed flower without damaging unopened buds beside it. You do not need to remove the whole scape while it still carries viable buds.
If a pollinated flower begins developing a seed pod and you are not intentionally breeding or growing daylilies from seed, the pod can also be removed. Seed production uses plant resources that could otherwise remain available for vegetative growth and future performance.
This is where gardening advice often becomes too absolute. Deadheading may help prevent energy from being directed into seed production, and some recommendations encourage it on reblooming cultivars. But deadheading does not turn a non-reblooming cultivar into a rebloomer.
Rebloom is fundamentally a cultivar characteristic. A reblooming daylily can produce additional flowering scapes after its first display, while another cultivar may have only one primary flush regardless of how diligently you remove faded flowers.
If repeat flowering is a priority, start with cultivars known for that trait. Gardenia’s Reblooming Daylilies guide lets you compare cultivars capable of producing additional scapes.
Deadheading shortcut: Remove the faded flower, not the flowering stalk that still carries buds. Deadheading tidies the plant and prevents unwanted seed development, but genetics and growing conditions determine whether a daylily can rebloom.
Once every bud and flower on a scape has finished, that flower stalk has completed its job. Cut it close to ground level or near the base of the crown with clean hand pruners.
Removing finished scapes has several practical advantages. It eliminates the bare stalks that can make a clump look untidy, prevents unwanted seed pods from developing, and makes it easier to see whether a reblooming cultivar is sending up fresh scapes from the crown.
A new rebloom scape is a separate new flowering stalk. Cutting away an old, completely finished scape does not mean cutting away the plant’s ability to produce another one.
Cut as low as practical without digging the blades into the crown or nearby fans.
Scape test: Buds still present? Leave the scape. Every bud finished? Cut the scape near the base. The decision depends on the stalk itself, not on whether neighboring scapes are still flowering.
For routine maintenance, healthy green daylily foliage generally does not need to be cut down simply because flowering has finished.
This is the most important distinction in the entire article. Removing empty scapes is normal grooming. Shearing all the foliage to a short stump is a different treatment entirely.
Green leaves remain active after flowering. As long as they are healthy, they continue supporting the plant. There is no general horticultural requirement to remove them once the flowers disappear.
Extension recommendations reinforce this distinction. Routine care guidance focuses on removing spent flowers and later removing dead foliage. Cutting the leaves to roughly 5-8 in. (13-20 cm) is commonly recommended specifically when daylilies are being divided or transplanted, where reducing leaf area helps make divisions easier to handle and reduces water loss while disturbed roots re-establish.
Do not confuse division with routine pruning. Advice to cut daylily fans back to 5-8 inches usually accompanies instructions for lifting and dividing the clump. It is not a requirement to shear every established daylily after it flowers.
Do not rely on foliage cutting as a rebloom technique. A hard haircut does not give a daylily a new genetic flowering cycle. A cultivar capable of rebloom may send up another scape when climate, moisture, vigor, and growing-season length support it, but removing healthy leaf area is not what creates that ability.
If your goal is more flowers, focus first on cultivar selection, adequate sunlight, moisture during active growth, correct crown depth, and clump vigor.
If your daylilies produce lush foliage but few flowers, see Gardenia’s guide to Why Are My Daylilies Not Blooming? rather than automatically cutting the leaves.
This is the situation that tempts many gardeners to reach for shears. By midsummer, daylily foliage may have brown tips, yellow outer leaves, storm damage, pest injury, or simply a tired appearance.
You do not have to choose between leaving an ugly clump untouched and cutting everything to the ground.
Pull or cut away completely brown, broken, collapsed, or badly damaged leaves. Selective grooming can dramatically improve the plant’s appearance while preserving healthy green foliage.
Brown leaf ends can be trimmed for appearance, although this is cosmetic rather than necessary for the plant. Follow the general shape of the leaf instead of creating an obvious flat haircut across the entire clump.
Yellow foliage is not always simply an invitation to prune. If the entire plant is deteriorating unusually early, check for drought stress, excessive moisture, root problems, nutrient issues, daylily rust, or other diseases before hiding the symptom with shears.
Gardenia’s Daylily Growing Guide provides additional information on the genus and its growing requirements.
Tidy selectively before you shear. A few brown leaves can make an entire daylily clump look tired. Removing only the declining material often restores a much cleaner appearance without sacrificing all of the healthy foliage.
Division is one of the situations in which shortening healthy foliage makes practical sense.
Daylilies can form increasingly large clumps over time. When flowering declines because the clump has become crowded, or when you simply want to propagate or relocate it, the plant can be lifted and separated into smaller fans.
When dividing in late summer, Extension recommendations commonly shorten the foliage to approximately 5-8 in. (13-20 cm). This reduces the amount of leaf area the disturbed root system must support and makes the divisions much easier to handle and replant.
This is very different from cutting an established, undisturbed clump merely because its flowers are finished.
Replant divisions promptly, position the crown correctly, and water thoroughly. Keep the soil reasonably moist while new roots establish.
For detailed division timing and complete care, see Gardenia’s Daylily Planting and Care Guide.
For daylilies whose foliage naturally yellows, collapses, and dies back, fall cleanup can begin once the leaves are clearly declining or have been killed by cold weather.
At that stage, the old foliage is no longer contributing much to the plant. Cut or pull away the dead leaves and remove old flower stalks and plant debris from around the crown.
You can cut dead foliage down close to the ground, taking care not to damage the crown.
No. In many gardens, dead daylily foliage can be left over winter and removed before new growth begins in spring. Both fall and early-spring cleanup are workable approaches for healthy plants.
Fall cleanup has the advantage of leaving the planting tidy and removing collapsed debris before winter. Spring cleanup leaves the garden less disturbed through winter and postpones the work until just before new leaves emerge.
If the foliage was diseased, removing infected plant debris rather than leaving it around the crown is the more prudent choice.
Fall cleanup should follow the foliage, not the calendar. If the leaves are still healthy and green, there is little reason to rush. When they have yellowed, browned, collapsed, or been killed by frost, cleanup becomes straightforward.
Not every daylily loses its foliage in exactly the same way. Cultivars are commonly described as dormant, semi-evergreen, or evergreen, and winter behavior is also influenced by climate.
Dormant cultivars naturally stop active top growth and lose their foliage as winter approaches. Once the leaves are brown and dead, they can be removed in fall or before new shoots appear in spring.
Semi-evergreen cultivars fall between dormant and evergreen behavior. Their foliage may remain partly green in mild conditions but decline much more extensively where winters are colder.
Remove dead or badly damaged leaves while leaving sound green foliage where it remains functional.
Evergreen cultivars are genetically inclined to maintain foliage where temperatures allow. In mild climates, do not automatically cut healthy evergreen foliage to the ground simply because the calendar says fall.
Instead, remove brown, damaged, diseased, or weather-beaten foliage as necessary. In colder regions, even cultivars classed as evergreen may suffer substantial winter foliage damage, which can be cleaned away as new growth resumes.
Foliage habit is not the same as hardiness. “Evergreen,” “semi-evergreen,” and “dormant” describe foliage behavior, while winter survival depends on the cultivar’s hardiness and local growing conditions.
Diseased foliage is an exception to the “leave healthy foliage” rule. Leaves showing significant disease symptoms should be managed for plant health rather than retained simply because they are still partly green.
Remove badly affected foliage and fallen debris, particularly where fungal disease is present. Do not compost obviously diseased material unless your composting system reliably reaches temperatures capable of destroying the pathogen.
Clean pruning tools after working with diseased plants before moving to healthy clumps.
Daylily rust, leaf streak, crown and root rots, and other problems can produce yellowing or damaged leaves, so identify the cause before assuming every unattractive leaf is merely normal seasonal decline.
| When | What to Remove | What to Keep |
|---|---|---|
| During bloom | Spent flowers and unwanted seed pods | Scapes with unopened buds and all healthy foliage |
| After a scape finishes | The completed scape, cut near its base | Healthy leaf fans |
| After flowering | Brown, broken, diseased, or badly damaged leaves as needed | Healthy green foliage |
| When dividing | Shorten foliage to roughly 5-8 in. (13-20 cm) | Enough leaf and healthy roots for each division to establish |
| Fall or early spring | Dead foliage, old scapes, and debris | Healthy persistent foliage on semi-evergreen or evergreen plants where appropriate |
Most pruning mistakes come from cutting the wrong plant part at the wrong time. Use this quick guide before reaching for the shears.
| Common Mistake | Why It Is a Problem | Better Approach |
|---|---|---|
| Cutting the whole plant when the last flower fades | The flower display may be finished while the foliage is still healthy and active. | Remove finished scapes, but leave healthy green leaf fans in place. |
| Cutting a scape that still has buds | One faded flower does not mean the entire scape is finished. | Check for unopened buds and wait until every flower and bud on that scape is done. |
| Expecting deadheading to create rebloom | Deadheading does not give a non-reblooming cultivar the genetic ability to produce another flush. | Choose cultivars known to rebloom, then use deadheading mainly to remove spent flowers and unwanted seed pods. |
| Leaving unwanted seed pods | The plant can devote resources to developing seed you do not intend to use. | Remove developing pods unless you are intentionally breeding or raising daylilies from seed. |
| Shearing because a few leaf tips are brown | A few untidy leaves do not mean the entire fan needs to be cut back. | Remove individual dead or damaged leaves and trim brown tips selectively if appearance matters. |
| Cutting away symptoms without finding the cause | Premature yellowing, spotting, streaking, or collapse may indicate drought, root stress, pests, or disease. | Investigate the underlying problem before pruning simply to hide the symptoms. |
Gardenia’s shortcut: Before cutting, ask two questions: What part of the plant am I looking at, and is it actually finished? That simple check prevents most daylily pruning mistakes.
Cut finished flower scapes close to the base after all their flowers and buds are done. Leave healthy green foliage after flowering. Remove naturally dead foliage in fall or before new growth begins in spring.
Usually no. The flower scapes can be removed once finished, but healthy green leaf fans generally do not need to be cut to the ground simply because flowering has ended.
The scape is the leafless stalk that carries buds and flowers. Foliage is the fan of strap-shaped leaves growing from the crown. A finished scape can be removed while the foliage remains green and active.
No. Daily deadheading is optional and mainly keeps plants looking especially neat. Removing spent blooms periodically during flowering is sufficient for most gardens.
Deadheading prevents unwanted seed development and may support the performance of cultivars capable of rebloom, but it cannot make a genetically non-reblooming cultivar produce a second flowering cycle.
Wait until every flower and unopened bud on that scape has finished. Then cut the bare scape close to its base without damaging the crown or surrounding leaf fans.
Completely yellow or dead leaves can be removed. If an entire clump is yellowing unusually early, investigate moisture, roots, disease, nutrition, and other stresses rather than treating pruning as the solution.
Individual damaged or dead leaves can be removed at any time. Routine shearing of healthy established plants after flowering is generally unnecessary. Shortening foliage to about 5-8 inches is commonly recommended when daylilies are being divided or transplanted.
When daylilies are divided in late summer, Extension recommendations commonly shorten foliage to approximately 5-8 inches (13-20 cm). This makes divisions easier to handle and reduces leaf area while disturbed roots re-establish.
Either can work for healthy dormant foliage. Dead leaves may be removed after they decline in fall or left until early spring before new growth begins. Diseased debris is better removed rather than left around the crown.
Not automatically. In mild climates, healthy evergreen foliage may persist. Remove dead, damaged, diseased, or weather-beaten leaves as needed rather than cutting healthy foliage simply because it is fall.
Avoid routinely mowing healthy daylily foliage immediately after flowering. Flowering may be complete while the leaf fans are still active. Remove finished scapes and wait until foliage has naturally declined before a full seasonal cleanup.
The answer to “When should I cut back my daylilies?” depends entirely on which part of the plant you mean.
Remove individual faded flowers during bloom if you want a cleaner display and do not want seed. When every bud on a flower scape is finished, cut that scape near the base. But do not treat healthy green foliage as though it were a spent flower stalk.
For routine maintenance, leave healthy foliage while it remains active, selectively remove damaged leaves, and perform the major cleanup once foliage naturally declines in fall or before new growth begins in spring. Shorten healthy leaves more substantially when there is a specific reason, particularly when dividing or transplanting the plant.
Gardenia’s Daylily Cutback Rule:
Flower Off → Scape Down → Foliage On → Clean Up Late
Once you separate flowers, scapes, and foliage, daylily pruning becomes remarkably straightforward.
Updated: August 2026 • Reviewed by Gardenia Editors
| Hardiness |
3 - 9 |
|---|---|
| Heat Zones |
2 - 11 |
| Climate Zones | 2, 3, 4, 5, 6, 7, 8, 9, 10, 11, 12, 13, 14, 15, 16, 17, 18, 19, 20, 21, 22, 23, 24, H1, H2 |
| Plant Type | Perennials |
| Genus | Hemerocallis |
| Exposure | Full Sun, Partial Sun |
| Season of Interest | Summer (Early, Mid, Late), Fall |
| Maintenance | Low |
| Water Needs | Average |
| Soil Type | Chalk, Clay, Loam, Sand |
| Soil pH | Acid, Alkaline, Neutral |
| Soil Drainage | Moist but Well-Drained, Well-Drained |
| Characteristics | Showy |
| Tolerances | Drought, Rabbit, Dry Soil, Salt |
| Attracts | Butterflies, Hummingbirds |
| Landscaping Ideas | Banks And Slopes, Beds And Borders, Patio And Containers |
| Garden Styles | City and Courtyard, Coastal Garden, Informal and Cottage, Traditional Garden |
| Hardiness |
3 - 9 |
|---|---|
| Heat Zones |
2 - 11 |
| Climate Zones | 2, 3, 4, 5, 6, 7, 8, 9, 10, 11, 12, 13, 14, 15, 16, 17, 18, 19, 20, 21, 22, 23, 24, H1, H2 |
| Plant Type | Perennials |
| Genus | Hemerocallis |
| Exposure | Full Sun, Partial Sun |
| Season of Interest | Summer (Early, Mid, Late), Fall |
| Maintenance | Low |
| Water Needs | Average |
| Soil Type | Chalk, Clay, Loam, Sand |
| Soil pH | Acid, Alkaline, Neutral |
| Soil Drainage | Moist but Well-Drained, Well-Drained |
| Characteristics | Showy |
| Tolerances | Drought, Rabbit, Dry Soil, Salt |
| Attracts | Butterflies, Hummingbirds |
| Landscaping Ideas | Banks And Slopes, Beds And Borders, Patio And Containers |
| Garden Styles | City and Courtyard, Coastal Garden, Informal and Cottage, Traditional Garden |
Create a membership account to save your garden designs and to view them on any device.
Becoming a contributing member of Gardenia is easy and can be done in just a few minutes. If you provide us with your name, email address and the payment of a modest $25 annual membership fee, you will become a full member, enabling you to design and save up to 25 of your garden design ideas.
Join now and start creating your dream garden!
Create a membership account to save your garden designs and to view them on any device.
Becoming a contributing member of Gardenia is easy and can be done in just a few minutes. If you provide us with your name, email address and the payment of a modest $25 annual membership fee, you will become a full member, enabling you to design and save up to 25 of your garden design ideas.
Join now and start creating your dream garden!