Grow healthier daylilies and enjoy more flowers with this complete care guide. Learn where and how to plant daylilies, how much sun and water they need, when to fertilize, deadhead and divide them, how to grow them in containers, and how to diagnose common pests, diseases and flowering problems.
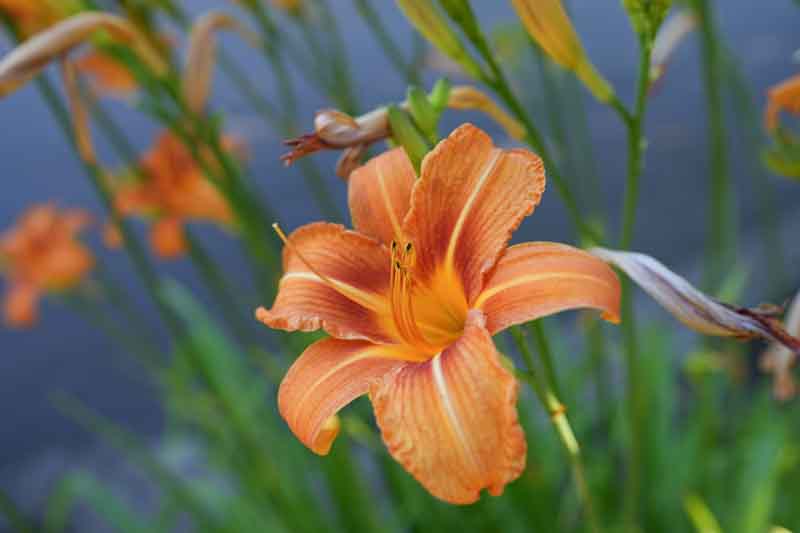


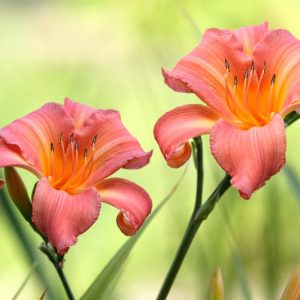
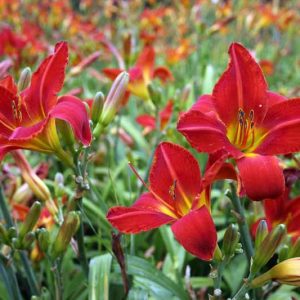
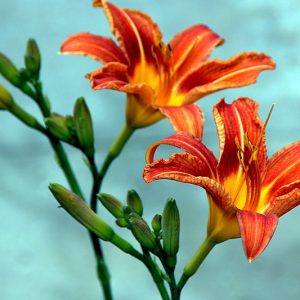
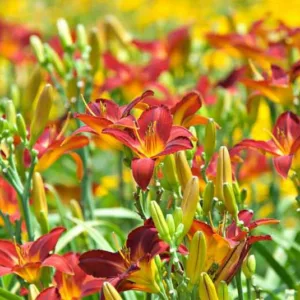
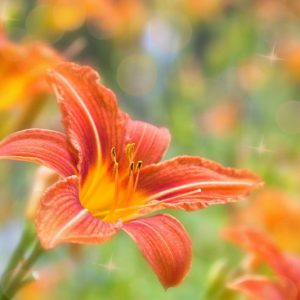
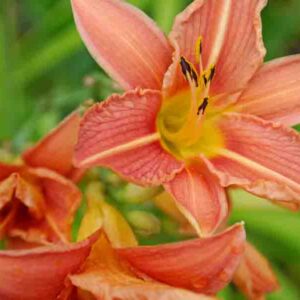
Few perennials combine resilience, flower power, and sheer variety as successfully as daylilies (Hemerocallis). Once established, these clump-forming perennials tolerate summer heat, occasional drought, and a surprisingly wide range of soils. Modern cultivars add thousands of choices in yellow, gold, orange, pink, red, purple, near-white, bicolors, doubles, spiders, and dramatically patterned flowers.
That toughness sometimes works against them. A daylily can remain alive for years in a site where it flowers poorly, which is why “my daylily is growing” and “my daylily is thriving” are not the same thing. Plants receiving strong light, adequate moisture while flower scapes and buds develop, sensible nutrition, and enough room to expand usually produce a very different display from neglected clumps surviving at the edge of a lawn.
Fortunately, daylily care does not need to be complicated. Get a handful of fundamentals right – sunlight, crown depth, water, space, and cultivar choice – and these long-lived perennials can remain among the easiest and most rewarding flowers in the summer garden.
When a daylily disappoints, start with these five factors before looking for complicated solutions.
Start here: When foliage looks healthy but flowers are scarce, check site and planting conditions before reaching for fertilizer.
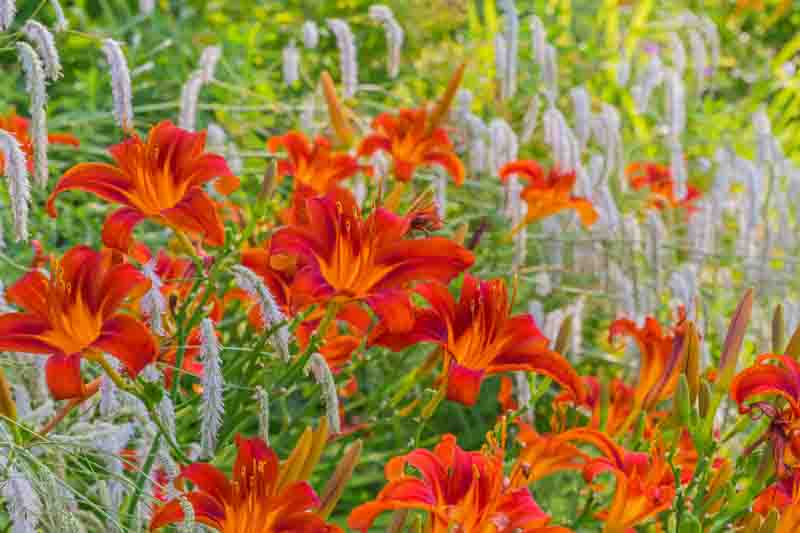
Despite their name, daylilies are not true lilies. Hemerocallis belongs to the Asphodelaceae family, while true lilies belong to the genus Lilium. Daylilies grow from fleshy, fibrous roots and form fans of strap-shaped leaves at ground level. True lilies grow from bulbs and generally carry leaves along upright stems.
The name “daylily” describes the life of an individual flower. Most blooms open for about a day, but a mature plant carries many buds on branched flower stalks called scapes. Those buds open successively, allowing the clump to flower for several weeks.
Some cultivars produce additional scapes later and are classified as rebloomers. Rebloom is not equally reliable everywhere. Cultivar genetics matter, but so do climate, growing season, moisture, and plant vigor.
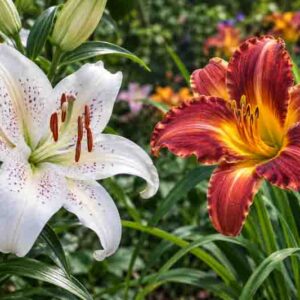
For a visual comparison, see Lily or Daylily? How to Tell the Difference.
Daylilies are often treated as though every cultivar behaves in the same way, but several characteristics influence what gardeners see in different climates.
Foliage habit should not be used as a shortcut for cold hardiness. An evergreen cultivar is not automatically tender, and a dormant daylily is not automatically the hardiest choice. Check the actual cultivar information when winter survival is important.
Most daylilies flower best with at least about six hours of direct sunlight each day. Plants growing in partial shade can remain healthy, but fewer scapes and flowers are common as light levels fall.
In very hot climates, some afternoon protection can be useful, particularly for dark red, purple, and other heat-sensitive flower colors. Morning sun followed by light afternoon shade often preserves flower quality better than relentless late-day heat.
If a mature clump once flowered generously but now produces mostly leaves, look upward. Trees and shrubs gradually enlarge, and a bed that received full sun ten years ago may now receive only a few hours.
Daylilies adapt to many soils, including clay and moderately sandy ground, but the best growth occurs in fertile soil that holds useful moisture while draining after heavy rain.
| Condition | Will a Daylily Often Survive? | Ideal for Heavy Flowering? |
|---|---|---|
| Partial shade | Yes | Usually not |
| Temporary drought | Yes | No |
| Lean soil | Often | Not necessarily |
| Heavy clay | Often | Only if drainage is adequate |
| Crowded clump | For years | Eventually no |
| Deep planting | Sometimes | No |
Spring is an especially forgiving planting season in cold regions because newly planted daylilies have months to establish before frozen ground becomes an issue. Established clumps can also be divided after flowering if enough growing season remains for the divisions to root before winter.
In very warm southern climates, early spring and cooler fall weather are usually easier on newly planted daylilies than the hottest part of summer. Freshly divided crowns are more vulnerable to heat and moisture stress than established clumps.
Container-grown plants can often be installed through a wider part of the growing season if water is available, but avoid transplanting during extreme heat whenever there is a better option.
Planting depth is one of the most important and most frequently overlooked parts of daylily care. The crown, where the roots meet the foliage, should sit near the finished soil surface and generally no more than about 1 in. (2.5 cm) below it.
For bare-root plants:
Do not bury the crown with yearly mulch. A daylily may be planted correctly and gradually become too deep after repeated layers of compost, bark, or mulch accumulate around it.
Spacing depends on the mature spread and vigor of the cultivar. A compact daylily may remain relatively tidy, while a vigorous large cultivar can develop into a substantial clump.
Close planting creates faster visual impact, but it also brings division forward. Daylilies continually add new fans around the crown, so a planting that looks comfortably spaced in its first season may be crowded several years later.
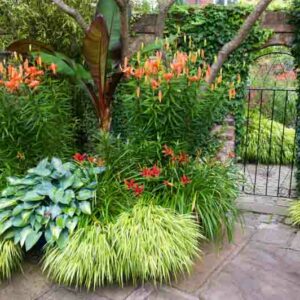
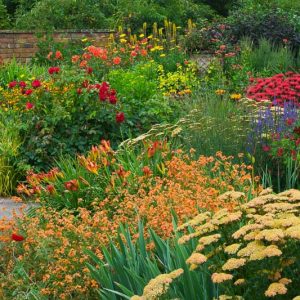
Leave enough room for neighboring perennials too. Daylilies combine beautifully with ornamental grasses, salvias, coneflowers, catmints, geraniums, and many other summer perennials when their light, soil, and moisture requirements are compatible. Explore Great Companion Plants for Daylilies for planting ideas.
Established daylilies tolerate temporary drought, but generous flowering is much more likely when plants receive reliable moisture during active growth. If irrigation must be prioritized, the most important period is while flower scapes are elongating and buds are forming.
Around 1 in. (2.5 cm) of water per week from rainfall and irrigation is a useful starting point during active growth, but it is not a rigid prescription. Sandy soils, containers, heat, wind, rainfall, and plant size can all change how quickly the root zone dries.
Water deeply enough to moisten the root zone rather than repeatedly dampening only the surface. Direct irrigation toward the soil when practical. Constantly wet foliage is unnecessary and can favor foliar disease.
Water rule: Protect the scape-and-bud window. If water is limited, avoiding serious drought while flower stalks and buds develop is more valuable than treating every week of the growing season as equally important.
Organic mulch helps suppress weeds, conserve moisture, and moderate soil temperatures. Compost, shredded leaves, and composted bark are useful choices, but keep thick material away from the crown.
Daylilies are not exceptionally heavy feeders. In reasonably fertile garden soil, compost may supply all the supplemental nutrition they need. Where plants appear deficient or soil fertility is uncertain, a soil test is more useful than feeding by habit.
Excessive nitrogen can create impressive foliage without producing a correspondingly impressive flower display. A large mass of dark green leaves with few scapes should trigger an investigation of sunlight, crowding, crown depth, and fertilizer history.
Fertilizer rule: Leaves first, fertilizer last. If a daylily already has abundant healthy foliage but flowers poorly, adding more nitrogen is rarely the first thing to try.
Most individual daylily flowers fade after their flowering cycle while unopened buds on the same scape continue developing. Removing spent flowers is largely a matter of appearance, although it also prevents seedpods from developing when seed is not wanted.
Once every bud on a scape has finished, the empty flower stalk can be cut close to its base. There is no advantage to leaving a bare scape standing for the rest of the season unless seedpods are being intentionally ripened.
Deadheading is sometimes promoted as though it forces rebloom. It does not. A cultivar’s ability to produce another set of scapes is genetically influenced and then modified by climate, length of growing season, moisture, and plant vigor.
No single daylily has to carry the whole summer. The most reliable way to extend flowering is to build a succession of cultivars whose main flowering seasons occur at different times.
Gardenia’s bloom rule: Build the season with bloom timing; extend it with rebloom.
Turn the strategy into plants. Choose daylilies by when you want them to flower, how much space you have, and whether you want a second flush of bloom.
| Your Garden Goal | Explore Gardenia’s Picks |
|---|---|
| Start the daylily season early | Early-Blooming Daylilies |
| Fill the heart of summer with peak bloom | Midseason Daylilies |
| Extend color into late summer | Late-Blooming Daylilies |
| Add another flush of flowers | Reblooming Daylilies |
| Fill a small border or container | Dwarf Daylilies |
| Keep the border interesting around daylilies | Daylily Companion Plants |
This strategy is more dependable than buying several plants labeled “reblooming” and expecting them to flower continuously from June through September in every climate.
Best strategy: Combine several bloom seasons first, then use rebloomers and companion plants to extend the display rather than expecting one daylily to provide color all summer.
Healthy daylily foliage does not need to be cut to the ground as soon as flowering ends. The leaves continue photosynthesizing and supporting the crown and root system.
Instead, remove yellow or badly damaged leaves individually and leave healthy foliage intact. Some older leaves naturally yellow during summer, particularly after heat or drought. This normal turnover should not automatically be interpreted as disease.
Dormant cultivars eventually lose their foliage naturally. Once it has browned, dead growth can be removed in fall or during early spring cleanup. Evergreen and semi-evergreen cultivars may retain more foliage through mild winters, although exposed leaves can still look ragged after cold weather. For detailed guidance on deadheading, summer cleanup, and when to remove foliage, see Gardenia’s When to Cut Back Daylilies: Deadheading and Fall Care.
Daylily clumps expand by producing new fans. Eventually, a vigorous plant may fill its available space and flowering can begin to decline as congestion increases.
Early spring and the period immediately after flowering are both useful times for division. Avoid extreme heat where practical, because newly divided crowns lose part of their established root system and need time to recover.
A division with two or three healthy fans establishes quickly, although smaller divisions can also be used for propagation.
There is no need to divide a thriving daylily simply because a fixed number of years has passed. Vigorous clumps are often divided every three to five years, but plant performance is the better trigger. For detailed timing, preparation, dividing techniques, and aftercare, see Gardenia’s When to Divide Daylilies and How to Do It Right.
Division rule: Divide because the plant tells you to, not because the calendar does. Declining flowering, an increasingly congested center, or a clump that has exceeded its allotted space are better reasons than age alone.
Daylilies adapt well to containers, particularly compact and dwarf daylilies. Pots are useful on patios and balconies and where garden soil is unsuitable.
Container roots experience larger temperature swings than roots in the ground. Pots may become very hot in summer and can freeze deeply during winter. Cold-climate gardeners may need to insulate containers or move them to a sheltered position.
Established hardy daylilies planted in the ground usually need little winter attention. Dormant cultivars naturally lose their foliage, while evergreen and semi-evergreen types retain varying amounts depending on climate and winter temperatures.
Newly planted or recently divided daylilies deserve more attention because their roots are not yet fully established. In cold regions, a loose mulch applied after the ground cools can moderate rapid temperature changes, but avoid burying the crown beneath a dense layer of wet material.
Winter drainage remains important. Daylilies tolerate cold far better than crowns sitting for prolonged periods in saturated soil.
Daylilies are generally robust, but they are not problem-free. The pests encountered vary by region.
Daylily rust is caused by Puccinia hemerocallidis. Yellow to brown spots and streaks develop on foliage, followed by powdery yellow-orange pustules, often most obvious on leaf undersides. Rubbing suspect areas with white tissue may pick up orange-yellow spores.
Daylily leaf streak, caused by Aureobasidium microstictum, produces elongated yellowing and brown lesions that may progress into significant leaf dieback. Good sanitation, airflow, and avoiding prolonged leaf wetness help limit disease development.
Rot can cause yellowing, wilting, collapsing foliage, and soft or discolored tissue around the crown and roots. Several pathogens and environmental stresses may be involved, so persistent crown rot is difficult to diagnose accurately from symptoms alone.
Good drainage, careful division, moderate feeding, and avoiding severe transplant stress are among the most useful preventive measures.
A healthy-looking clump with few flowers is one of the most common daylily frustrations. Instead of treating every case as a fertilizer problem, use the appearance of the plant to narrow the possibilities.
| What You See | Check First | Then Check | Likely Direction |
|---|---|---|---|
| Lots of healthy leaves, few flowers | Sunlight | Crown depth | Increasing shade or deep planting |
| Large clump, fewer scapes than before | Crowding | Sunlight | Division may be needed |
| Scapes develop but buds are sparse or small | Spring moisture | Root condition | Water stress during bud development |
| Very lush foliage, few flowers | Fertilizer history | Sunlight | Excess nitrogen or insufficient light |
| Orange powder beneath leaves | Wipe test | Nearby daylilies | Possible daylily rust |
| Yellow-brown streaks and leaf dieback | Lesion pattern | Leaf wetness and sanitation | Possible leaf streak |
| Soft crown, wilting, unpleasant odor | Drainage | Crown and roots | Possible crown or root rot |
| Good main bloom, no second flush | Cultivar | Climate and vigor | Normal non-rebloom or weak local rebloom |
The Gardenia diagnostic starts with the plant’s overall pattern rather than a single symptom. A vigorous leafy daylily with poor flowering calls for a different investigation from a plant whose foliage is yellowing, collapsing, or developing lesions.
Still not sure what’s wrong? Compare your symptoms with Gardenia’s illustrated daylily pest and disease guides.
Some daylilies spread much more aggressively than others. The familiar orange or tawny daylily, Hemerocallis fulva, has escaped cultivation and formed persistent colonies in parts of North America.
This should not be translated into the blanket statement that “all daylilies are invasive.” Many named hybrid cultivars behave as manageable clump-forming perennials and do not spread through landscapes in the same manner as aggressive populations of H. fulva.
Where native planting is the goal, see Gardenia’s Native Plant Alternatives to Hemerocallis fulva.
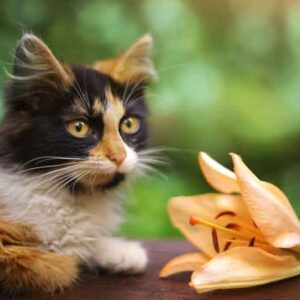
Critical cat-safety warning: Daylilies (Hemerocallis) can cause severe, potentially fatal kidney injury in cats. Suspected exposure requires immediate veterinary attention. Do not wait for symptoms to appear.
Daylilies and true lilies are botanically unrelated, but both can present a serious danger to cats. Gardeners with cats should see Gardenia’s Lily and Daylily Cat Safety Guide for the differences among true lilies, daylilies, and unrelated plants that simply contain “lily” in their common name.
| Season | Main Daylily Tasks |
|---|---|
| Spring | Remove dead foliage, plant new daylilies, divide congested clumps where appropriate, weed, mulch without burying crowns, test soil if feeding is needed, and provide reliable moisture as scapes and buds develop. |
| Summer | Water during dry periods, remove spent flowers if desired, cut finished scapes, watch for pests and foliar diseases, and enjoy the progression from early through late and reblooming cultivars. |
| Fall | Keep recent divisions watered until established, remove seriously diseased foliage, clear dead leaves from dormant cultivars, and protect late plantings in very cold regions where appropriate. |
| Winter | Allow hardy plants to remain dormant, avoid persistently waterlogged crowns, protect vulnerable containers from severe freezing, and plan cultivar combinations for a longer flowering season next year. |
Daylilies earn their easy-care reputation because they tolerate conditions that would defeat many flowering perennials. Their best performance, however, comes from something more deliberate than simple survival.
Give them substantial sunlight, keep the crown close to soil level, protect the spring period when scapes and flower buds are developing, avoid unnecessary fertilizer, and divide established clumps when crowding begins to reduce performance.
For a genuinely long flowering season, choose cultivars strategically rather than depending on one plant labeled “reblooming.” Early, midseason, late, and reblooming cultivars can overlap to produce a far longer display, particularly when companion plants extend interest before and after peak daylily season.
That is the useful way to think about daylilies: not as indestructible plants that will flower anywhere, but as adaptable perennials whose performance responds clearly to light, water, space, planting depth, and cultivar choice.
Most daylilies flower best with about six hours or more of direct sunlight per day. They tolerate partial shade, but flowering usually decreases as shade increases. In very hot climates, dark red and purple cultivars may benefit from some protection from intense afternoon sun.
Plant daylilies shallowly. Position the crown, where the foliage meets the roots, near soil level and generally no more than about 1 in. (2.5 cm) below the surface. Planting too deeply can reduce vigor and flowering.
Established daylilies tolerate temporary drought but produce better growth and flowering with reliable moisture. Around 1 in. (2.5 cm) of water per week is a useful starting point during active growth, adjusted for rainfall, soil, heat, wind, and container conditions. Moisture is especially important while scapes and buds develop.
Deadheading is optional but keeps plants attractive and prevents unwanted seed formation. Remove faded flowers if desired and cut completed flower scapes near the base. Deadheading does not guarantee another flush of flowers because rebloom depends strongly on cultivar, climate, and growing conditions.
Divide daylilies when mature clumps become crowded, flowering declines, or plants have outgrown their allotted space. Early spring and immediately after flowering are common division times. Three to five years is a useful guideline for vigorous clumps, but productive plants do not need division on a fixed schedule.
Common causes include insufficient sunlight, crowns planted too deeply, overcrowding, drought while scapes and buds develop, recent division, excessive nitrogen, poor drainage, root problems, or cultivar and climate differences. Check light, planting depth, crowding, and moisture before automatically adding fertilizer.
Most individual cultivars have a defined primary flowering season rather than blooming continuously all summer. For longer color, combine early, midseason, late, and very late cultivars, then add reblooming daylilies that may produce additional scapes later in the season.
Yes. Daylilies grow well in containers, especially compact and dwarf cultivars. Use a substantial pot with drainage holes, quality potting mix, consistent moisture during active growth, and enough room for new fans. Container-grown plants may need additional winter protection in cold climates.
Established daylilies can tolerate periods of drought, but drought tolerance does not mean they prefer dry soil. Plants generally flower more generously when supplied with adequate moisture, particularly while flower scapes and buds are developing.
Some daylilies can spread aggressively, particularly Hemerocallis fulva, the common orange or tawny daylily, which has naturalized outside gardens in parts of North America. This behavior should not automatically be attributed to all named hybrid daylilies.
Yes. Daylilies in the genus Hemerocallis can cause severe, potentially fatal kidney injury in cats. Keep cats away from the plants and seek immediate veterinary attention after any suspected exposure rather than waiting for symptoms to appear.
Daylilies belong to the genus Hemerocallis and produce fans of strap-like leaves from fleshy roots and crowns. True lilies belong to the genus Lilium, grow from bulbs, and generally produce leaves along upright stems. The two plants are botanically unrelated.
Updated: August 2026 • Reviewed by Gardenia Editors
| Hardiness |
3 - 9 |
|---|---|
| Heat Zones |
2 - 11 |
| Climate Zones | 2, 3, 4, 5, 6, 7, 8, 9, 10, 11, 12, 13, 14, 15, 16, 17, 18, 19, 20, 21, 22, 23, 24, H1, H2 |
| Plant Type | Perennials |
| Genus | Hemerocallis |
| Exposure | Full Sun, Partial Sun |
| Season of Interest | Summer (Early, Mid, Late), Fall |
| Maintenance | Low |
| Water Needs | Average |
| Soil Type | Chalk, Clay, Loam, Sand |
| Soil pH | Acid, Alkaline, Neutral |
| Soil Drainage | Moist but Well-Drained, Well-Drained |
| Characteristics | Showy |
| Tolerance | Drought, Rabbit, Dry Soil, Salt |
| Attracts | Butterflies, Hummingbirds |
| Landscaping Ideas | Banks And Slopes, Beds And Borders, Patio And Containers |
| Garden Styles | City and Courtyard, Coastal Garden, Informal and Cottage, Traditional Garden |
| Hardiness |
3 - 9 |
|---|---|
| Heat Zones |
2 - 11 |
| Climate Zones | 2, 3, 4, 5, 6, 7, 8, 9, 10, 11, 12, 13, 14, 15, 16, 17, 18, 19, 20, 21, 22, 23, 24, H1, H2 |
| Plant Type | Perennials |
| Genus | Hemerocallis |
| Exposure | Full Sun, Partial Sun |
| Season of Interest | Summer (Early, Mid, Late), Fall |
| Maintenance | Low |
| Water Needs | Average |
| Soil Type | Chalk, Clay, Loam, Sand |
| Soil pH | Acid, Alkaline, Neutral |
| Soil Drainage | Moist but Well-Drained, Well-Drained |
| Characteristics | Showy |
| Tolerance | Drought, Rabbit, Dry Soil, Salt |
| Attracts | Butterflies, Hummingbirds |
| Landscaping Ideas | Banks And Slopes, Beds And Borders, Patio And Containers |
| Garden Styles | City and Courtyard, Coastal Garden, Informal and Cottage, Traditional Garden |
Create a membership account to save your garden designs and to view them on any device.
Becoming a contributing member of Gardenia is easy and can be done in just a few minutes. If you provide us with your name, email address and the payment of a modest $25 annual membership fee, you will become a full member, enabling you to design and save up to 25 of your garden design ideas.
Join now and start creating your dream garden!
Create a membership account to save your garden designs and to view them on any device.
Becoming a contributing member of Gardenia is easy and can be done in just a few minutes. If you provide us with your name, email address and the payment of a modest $25 annual membership fee, you will become a full member, enabling you to design and save up to 25 of your garden design ideas.
Join now and start creating your dream garden!