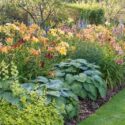
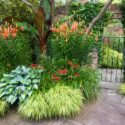
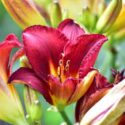
Crowded daylilies flowering less than they used to? Division can refresh the clump, create new plants, and restore breathing room. Learn the best times to divide daylilies, how to lift and separate the roots, how many fans to keep, and exactly how to replant divisions for a strong comeback.


Daylilies are vigorous, long-lived perennials, and a healthy clump can become impressively large over time. Eventually, you may want to divide it because flowering has declined, the plant has outgrown its space, you want to move it, or you simply want more plants.
The process is straightforward once you understand what you are looking at. A mature daylily (Hemerocallis) is made up of individual fans of leaves attached to crowns and fleshy roots. Division means lifting the clump, separating it into smaller rooted sections, and replanting those divisions at the correct depth.
The best timing is usually early spring or after flowering, when plants can re-establish without being subjected to the most stressful part of the growing season. But timing is only part of the decision. A daylily does not need to be dug up simply because a certain number of years has passed.
For complete planting, watering, feeding, deadheading, and seasonal care, see Gardenia’s How to Grow and Care for Daylilies: Complete Planting & Care Guide.
Lift → Separate → Reset → Water
| Step | What It Means | Key Check |
|---|---|---|
| Lift | Dig up the clump with as much of the root system intact as practical. | Avoid slicing through the crown unnecessarily. |
| Separate | Pull natural sections apart or use a clean sharp knife where needed. | Aim for divisions with 2-3 fans and a good root system. |
| Reset | Replant promptly at the proper depth. | Keep the crown about 1 in. (2.5 cm) below the soil surface. |
| Water | Water thoroughly after planting and monitor moisture while the plant establishes. | Do not let freshly divided plants dry out. |
Gardenia’s guiding principle: divide for a reason, not simply because the calendar says it is time. Then keep the process simple: Lift → Separate → Reset → Water.
Daylilies are forgiving plants, but some times of year are easier on them than others. The strongest windows are generally early spring and the period after flowering.
Early spring is an excellent time to divide daylilies as new growth begins to emerge. Temperatures are relatively mild, the plant is entering active growth, and there is usually plenty of growing season ahead for the divisions to establish.
There is one tradeoff: plants divided in spring may produce fewer flowers that summer or may not bloom at all that year. They are establishing after disturbance rather than performing like a mature, undisturbed clump.
Dividing after the main flowering period is another excellent option. You can enjoy the current season’s flowers first, then lift the clump while there is still time for the divisions to settle in before winter in many climates.
When dividing in late summer, shortening the foliage to roughly 5-8 in. (13-20 cm) makes the divisions more compact and easier to handle and replant.
Daylilies can tolerate division during the growing season, but avoid choosing the hottest, driest spell if you have another option. The American Daylily Society cautions that high temperatures increase transplant stress.
If summer division is unavoidable, prepare the new planting site before lifting the clump, work during a cooler part of the day if possible, replant promptly, and pay close attention to moisture afterward.
Timing shortcut: Spring is convenient before flowering. After bloom lets you enjoy the current display first. In extreme heat, wait for a cooler window if possible rather than adding unnecessary transplant stress.
University of Minnesota Extension notes that vigorous daylilies can be divided about every three to five years, while Clemson gives a broader range of approximately three to six years or as needed.
That does not mean every daylily should automatically be dug up on a schedule. Some clumps remain attractive, vigorous, and floriferous for longer. Others fill their available space more quickly.
Use the calendar as a reminder to inspect the plant, not as an order to divide it.
Gardenia’s division check: Do not ask only, “How old is this clump?” Ask, “Is it crowded, is flowering declining for a reason division can solve, has it outgrown its space, or do I want more plants?” If none applies, division may not be necessary.
| What You See | Divide? | Best Response |
|---|---|---|
| Large dense clump with declining flowering | Often yes | Rule out obvious light, planting-depth, moisture, or health problems, then divide if crowding is the likely cause. |
| Plant has outgrown its allotted space | Yes, if needed | Divide, reduce, or relocate the clump. |
| Healthy clump flowering strongly | Usually no | Leave it undisturbed unless you want more plants or need to move it. |
| Poor flowering but clump is not crowded | Not automatically | Check sunlight, crown depth, moisture, fertilizer history, and plant health first. |
| You want another plant of the same cultivar | Yes | Divide a healthy mature clump and replant the new sections. |
If poor flowering is the main problem and the clump does not appear crowded, see Gardenia’s Why Are My Daylilies Not Blooming? before assuming division is the answer.
Division goes much more smoothly if the destination is ready before the original clump comes out of the ground.
Choose a new site with suitable light, soil, drainage, and enough room for the plant to mature. Daylilies generally flower best with plenty of sun and perform especially well in moist but well-drained soil.
If the soil is very dry, watering in advance can make the clump easier to lift and the surrounding ground easier to work.
Dig the destination holes before lifting the parent clump. They should be wide enough to accommodate the fleshy roots without forcing them into a tight bundle.
Best preparation: Know where the divisions are going before you lift the parent clump. That keeps the process organized and allows the plants to be replanted promptly.
Start digging outside the visible crown rather than driving a spade directly through the middle of the plant. Work around the perimeter, loosening the soil and getting underneath the root mass.
Lift the entire clump if practical. Large, mature plants can be surprisingly heavy, so use a garden fork or spade as leverage instead of pulling hard on the foliage.
Some root damage is difficult to avoid. The goal is not to preserve every small root, but to keep healthy crowns and a substantial root system attached to the divisions you intend to replant.
You do not have to remove every particle of soil, but shaking or washing soil from a dense clump can make the individual fans, crowns, and natural separation points much easier to see.
Iowa State Extension specifically recommends shaking or washing the soil from the clump before separating it.
Do not divide blindly. Once you can see where the fans join the crown and roots, it becomes much easier to separate the plant deliberately rather than cutting randomly through healthy growth.
Once the clump is out of the ground, look for natural breaks between groups of fans.
Smaller or younger clumps can often be separated by hand. Hold the fans close to their bases and gently tease or pull sections apart while preserving the attached roots.
Older, tightly packed clumps may resist. In that case, use a clean, sharp knife to cut through connecting crown tissue at logical separation points.
For practical garden divisions, both University of Minnesota Extension and Iowa State Extension recommend sections with two to three fans of leaves and a good root system.
A fan is one cluster of leaves emerging from a crown. A mature clump may contain many fans packed tightly together.
The goal is not to create the largest possible number of tiny pieces. Keeping two or three healthy fans together gives you a substantial division that is easy to handle and replant.
Remove dead roots and discard sections with obvious rot or badly damaged crown tissue. Do not knowingly move serious disease or rot into a new planting site.
The American Daylily Society also advises allowing fresh wounds from division to air-dry briefly in the shade before replanting, particularly as part of reducing rot risk.
Division quality matters more than division quantity. Aim for healthy sections with 2-3 fans and good roots rather than turning one clump into the greatest possible number of pieces.
When daylilies are divided in late summer, shortening the foliage makes the divisions much easier to handle and replant.
University of Minnesota Extension recommends leaving about 5-6 inches of foliage when dividing, while Iowa State Extension recommends cutting late-summer divisions to approximately 6-8 inches. A practical range is therefore about 5-8 in. (13-20 cm).
This is a transplanting practice, not a general rule that all established daylilies should be sheared after flowering.
If you are unsure about the difference between removing spent flowers, cutting finished scapes, and shortening foliage during division, see Gardenia’s guide to When to Cut Back Daylilies: Deadheading, Scapes and Fall Cleanup.
Division is the exception. Cutting foliage to 5-8 inches is useful when handling late-summer divisions. It should not be confused with routinely cutting an established clump down simply because flowering has finished.
Replant healthy divisions promptly. Planting depth matters because burying a daylily crown too deeply can interfere with flowering and normal growth.
Position the crown, where the leaves and roots meet, about 1 in. (2.5 cm) below the finished soil surface.
Spread the roots naturally in the planting hole rather than folding or bunching them underneath the crown.
Return soil around the roots and firm it gently enough to eliminate large air pockets without compacting the soil hard around the crown.
Water immediately after planting until the soil around the roots is thoroughly moist. This settles the soil around the newly planted division.
Mulch can help conserve moisture and suppress weeds, but avoid piling a heavy layer over the crown. Repeatedly adding mulch directly over the plant can gradually bury it more deeply than intended.
Replanting check: Roots spread, crown about 1 inch below soil level, soil settled around the roots, and the new division watered thoroughly.
Freshly divided daylilies need time to establish after being lifted and replanted. The most important immediate task is making sure they receive adequate moisture without sitting in waterlogged soil.
Water well immediately after planting and continue to monitor soil moisture while the divisions establish. Do not assume that the drought tolerance of an established daylily clump applies immediately to a recently transplanted division.
Spring-divided daylilies may produce few flowers or may not bloom that summer. That does not mean the transplant has failed.
Judge newly divided plants first by establishment and healthy growth rather than expecting them to perform immediately like the mature clump they came from.
University of Minnesota Extension notes that winter mulch can help protect unestablished daylilies. Where cold-weather injury is a concern, newly planted divisions may benefit from protective mulch after the ground cools.
Aftercare priority: A freshly divided daylily needs establishment more than instant flowering. Keep it adequately watered and judge success first by healthy new growth.
Most problems after division come from unnecessary disturbance, poor timing, weak divisions, incorrect planting depth, or inadequate aftercare.
| Common Mistake | Why It Causes Trouble | Better Approach |
|---|---|---|
| Dividing automatically every few years | A healthy, well-flowering clump may not need disturbance. | Use plant performance, crowding, and available space to guide the decision. |
| Dividing during extreme heat | High temperatures increase transplant stress. | Choose early spring, after bloom, or a cooler weather window when possible. |
| Making very small divisions | Tiny sections provide less established crown and root material. | For routine garden use, keep 2-3 fans with healthy roots together. |
| Planting too deeply | A deeply buried crown can interfere with flowering and normal growth. | Set the crown about 1 in. (2.5 cm) below the soil surface. |
| Leaving divisions exposed while choosing where to plant them | The planting process becomes unnecessarily delayed. | Prepare the destination first and replant promptly. |
| Expecting full flowering immediately | Recently divided plants need time to establish. | Allow the divisions time to settle in, especially after spring division. |
| Assuming poor flowering always means crowding | Shade, deep planting, moisture stress, and plant-health problems can also reduce bloom. | Diagnose the likely cause before dividing a clump unnecessarily. |
Gardenia’s shortcut: Before dividing, ask two questions: Does this clump actually need division, and is this a good time to disturb it? If both answers are yes, proceed with Lift → Separate → Reset → Water.
Early spring and the period immediately after flowering are excellent times to divide daylilies. Late summer can also work well. Avoid extreme heat when possible because high temperatures increase transplant stress.
Vigorous daylilies can often be divided every three to five years, but this is not a mandatory schedule. Divide when the clump is crowded, outgrows its space, flowering declines for a reason division can solve, or you want additional plants.
Look for a very dense clump, reduced flowering after other likely causes have been considered, or a plant that has exceeded its available space. You can also divide a healthy mature clump simply because you want more plants of the same cultivar.
Yes. Early spring, as new growth begins, is one of the best times. Spring-divided plants may flower less heavily or may not bloom during that same summer.
Yes. Dividing immediately after flowering or in late summer is a standard approach and lets you enjoy the current flowering display before disturbing the clump.
Daylilies can tolerate summer division, but high temperatures increase transplant stress. If possible, wait for cooler conditions, prepare the planting site in advance, replant promptly, and monitor moisture carefully afterward.
When dividing in late summer, shortening the foliage to about 5-8 inches (13-20 cm) is commonly recommended. This makes the divisions more compact and easier to handle and replant.
For routine garden divisions, University of Minnesota Extension and Iowa State Extension recommend keeping two to three fans of leaves with a good root system attached.
Often yes. Smaller clumps may separate naturally when gently pulled apart. Large or dense clumps may require a clean, sharp knife to divide the crown into healthy sections.
It is not essential to remove every trace of soil, but shaking or washing some soil away can make the fans, crowns, roots, and natural division points easier to see.
Set the crown, where the leaves meet the roots, about 1 inch (2.5 cm) below the finished soil surface. Spread the roots naturally and avoid planting the crown too deeply.
Timing varies. Spring-divided daylilies may produce fewer flowers or may not bloom during the same summer. Give the plants time to establish rather than expecting the original clump’s full flower display immediately.
Water thoroughly immediately after replanting and monitor soil moisture while the divisions establish. Avoid allowing newly planted divisions to dry out or remain in waterlogged soil.
Yes. Division is a simple way to propagate a named daylily cultivar while preserving its characteristics. A healthy mature clump can be divided even if overcrowding is not yet a problem.
Daylilies are easy to divide, but they do not need to be disturbed simply because several years have passed.
Divide when the clump has become crowded, flowering has declined for a reason division can solve, the plant has outgrown its space, you need to relocate it, or you want more plants. Early spring and the period after flowering are the most useful windows, with late summer also well suited to the job.
Lift the clump carefully, separate it into healthy divisions with two or three fans and good roots, shorten late-summer foliage if needed, and replant with the crown about 1 inch below the soil surface. Finish by watering thoroughly and giving the divisions time to establish.
Gardenia’s Daylily Division Method:
Lift → Separate → Reset → Water
Once you stop treating division as a calendar chore and start treating it as a response to the plant, the decision becomes much easier.
Updated: August 2026 • Reviewed by Gardenia Editors
| Hardiness |
3 - 9 |
|---|---|
| Heat Zones |
2 - 11 |
| Climate Zones | 2, 3, 4, 5, 6, 7, 8, 9, 10, 11, 12, 13, 14, 15, 16, 17, 18, 19, 20, 21, 22, 23, 24, H1, H2 |
| Plant Type | Perennials |
| Genus | Hemerocallis |
| Exposure | Full Sun, Partial Sun |
| Season of Interest | Summer (Early, Mid, Late), Fall |
| Maintenance | Low |
| Water Needs | Average |
| Soil Type | Chalk, Clay, Loam, Sand |
| Soil pH | Acid, Alkaline, Neutral |
| Soil Drainage | Moist but Well-Drained, Well-Drained |
| Characteristics | Showy |
| Tolerances | Drought, Rabbit, Dry Soil, Salt |
| Attracts | Butterflies, Hummingbirds |
| Landscaping Ideas | Banks And Slopes, Beds And Borders, Patio And Containers |
| Garden Styles | City and Courtyard, Coastal Garden, Informal and Cottage, Traditional Garden |
| Hardiness |
3 - 9 |
|---|---|
| Heat Zones |
2 - 11 |
| Climate Zones | 2, 3, 4, 5, 6, 7, 8, 9, 10, 11, 12, 13, 14, 15, 16, 17, 18, 19, 20, 21, 22, 23, 24, H1, H2 |
| Plant Type | Perennials |
| Genus | Hemerocallis |
| Exposure | Full Sun, Partial Sun |
| Season of Interest | Summer (Early, Mid, Late), Fall |
| Maintenance | Low |
| Water Needs | Average |
| Soil Type | Chalk, Clay, Loam, Sand |
| Soil pH | Acid, Alkaline, Neutral |
| Soil Drainage | Moist but Well-Drained, Well-Drained |
| Characteristics | Showy |
| Tolerances | Drought, Rabbit, Dry Soil, Salt |
| Attracts | Butterflies, Hummingbirds |
| Landscaping Ideas | Banks And Slopes, Beds And Borders, Patio And Containers |
| Garden Styles | City and Courtyard, Coastal Garden, Informal and Cottage, Traditional Garden |
Create a membership account to save your garden designs and to view them on any device.
Becoming a contributing member of Gardenia is easy and can be done in just a few minutes. If you provide us with your name, email address and the payment of a modest $25 annual membership fee, you will become a full member, enabling you to design and save up to 25 of your garden design ideas.
Join now and start creating your dream garden!
Create a membership account to save your garden designs and to view them on any device.
Becoming a contributing member of Gardenia is easy and can be done in just a few minutes. If you provide us with your name, email address and the payment of a modest $25 annual membership fee, you will become a full member, enabling you to design and save up to 25 of your garden design ideas.
Join now and start creating your dream garden!