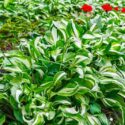
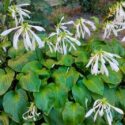
When should you divide a Hosta, and how large should each division be? Learn the best timing, how to lift and split small or giant clumps, how many shoots and roots to keep, correct planting depth, aftercare, container division, HVX precautions, and mistakes that delay recovery.



Hostas are remarkably long-lived perennials, and one of their great advantages is that they do not need constant lifting and dividing to stay healthy. A well-sited Hosta can remain undisturbed for many years, gradually developing into a broad, impressive clump.
Division becomes useful when a plant outgrows its space, develops a thinning or declining center, needs to be moved, fills a container, or simply needs to be multiplied. The important question is not “How many years has this Hosta been here?” but “Is there actually a reason to divide it?”
Timing also matters. So do the size of each division, the amount of root retained, planting depth, tool hygiene, and aftercare. Divide at a low-stress time and replant promptly, and Hostas are generally forgiving. Divide a large, fully leafed plant during hot weather, cut it into tiny pieces, or allow exposed roots to dry, and recovery can take much longer.
This guide explains when to divide Hostas, how to tell whether division is necessary, how to split small and giant clumps, how many shoots to keep, how deeply to replant, and how to help new divisions establish quickly.
The most important rule: Divide a Hosta because the plant or your garden needs it – not simply because a fixed number of years has passed. A vigorous, uncongested Hosta can remain undisturbed for a long time.
| Question | Best Guidance |
|---|---|
| Best time to divide | Early spring as shoots emerge; early fall is also suitable in many climates |
| Does every Hosta need division? | No. Healthy plants can remain undisturbed for many years |
| Why divide? | Multiply plants, control size, relieve congestion, renew an aging center, or relocate a clump |
| Ideal division size | 2-3 healthy shoots with good roots provide a useful balance between multiplication and recovery |
| Planting depth | Replant at approximately the original depth; do not bury the crown deeply |
| Aftercare | Replant promptly, water thoroughly, and keep the root zone reliably moist during establishment |
Not automatically. Hostas are clump-forming perennials, and many become more impressive as they mature. A vigorous specimen with a full, symmetrical mound and healthy foliage does not need to be disturbed merely because it has occupied the same spot for four or five years.
Division becomes useful when:
You want more plants. Division is the most dependable way to reproduce a named Hosta cultivar while preserving its foliage characteristics.
The clump has outgrown its position. Mature Hostas can extend much farther than expected when planted beside paths or smaller neighbors.
The center has become sparse. Some older or heavily congested clumps can lose vigor in the middle.
Plants are crowding one another. Division can restore space and allow each plant to regain a distinct outline.
The Hosta needs relocating. A site may become too sunny, too dry, too crowded with tree roots, or simply unsuitable for the garden design.
A container is congested. Potted Hostas eventually may need division, repotting, or both.
Some gardening references mention dividing Hostas every three to five years or every four to five years. That may be useful as a rough reminder to inspect a clump, but it should not be treated as a compulsory schedule. Cultivar size, site conditions, spacing, soil, moisture, and the purpose of division matter more than plant age alone.
A large Hosta is not necessarily an overcrowded Hosta. Giant cultivars are supposed to become large. Check the mature size before dividing simply because a plant looks enormous.
For example, Hosta ‘Empress Wu’ can form a huge mound roughly 5-6 ft. across. If planted in a tiny space, repeated division may temporarily control it, but the real issue is that the cultivar is too large for the site.
Early spring is usually the easiest time to divide Hostas. The pointed shoots, commonly called eyes or noses, are visible but the plant has not yet produced a full canopy of large leaves. Cool conditions also reduce moisture stress while disturbed roots begin re-establishing.
Early fall is another useful division window in many climates. Soil is often still warm enough for root growth while summer heat is declining. The important limitation is time: divisions need an opportunity to establish before the ground freezes or severe winter conditions arrive.
Spring is particularly convenient because the individual growing points are easier to see and the plant is much easier to handle before its foliage has fully expanded.
The ideal moment is when shoots have emerged but remain relatively compact. Fully leafed Hostas can still be divided, but larger leaves lose more water and are more easily torn during lifting and handling.
Early fall can work very well where the growing season remains mild enough for root development. Divide early enough that plants are not going straight from major root disturbance into frozen ground.
Water fall divisions carefully if rainfall is limited. In very cold climates, spring is generally more forgiving than a late division close to winter.
Yes. Hostas are resilient enough to be divided during the growing season, but summer is not the easiest time. Fully expanded foliage transpires heavily, and hot weather can dry disturbed root systems quickly.
If summer division cannot be avoided, choose a cool or cloudy period, prepare the new planting holes before lifting the plant, keep roots shaded and moist, replant promptly, and monitor soil moisture closely afterward.
Gardenia’s timing principle: The easiest division window occurs when root establishment is favorable but leaf stress is low. That is why emerging spring Hostas and early-fall plants are generally easier to divide than fully leafed specimens during hot weather.
Look at the plant rather than the calendar.
Division may be useful when:
the center of the clump has become sparse or noticeably less vigorous;
multiple crowns are packed tightly together;
the plant is pressing into a path or overwhelming nearby perennials;
you want to move part of a valuable mature clump without relocating the entire plant;
a container is crowded with roots and crowns;
you want additional plants that remain true to the cultivar.
Do not assume that a poorly growing Hosta needs dividing. Chronic drought, mature tree roots, excessive sun, waterlogged soil, repeated browsing, crown disease, or an unsuitable climate can all make a Hosta smaller and weaker.
If a plant is declining rather than merely crowded, diagnose the cause first. Gardenia’s Hosta Problems: Yellow Leaves, Brown Edges, Holes, Wilting and Poor Growth guide can help separate congestion from environmental stress, pests, and disease.
Hosta division requires little specialized equipment, but everything should be ready before the plant is lifted so exposed roots do not sit in sun or drying wind while you search for tools or choose a new planting site.
a sturdy garden fork or spade;
a clean, sharp knife or cutting tool for dense crowns;
a tarp, board, or sheet for holding the lifted clump;
a watering can or hose;
prepared planting holes or containers;
fresh potting mix if divisions are going into pots.
Tool hygiene is especially important when dividing Hostas. Hosta Virus X can spread in contaminated sap carried from an infected plant to a healthy one on knives, spades, pruners, and other equipment.
Decontaminate cutting tools between individual Hostas, particularly when working through several cultivars. Do not simply move from one clump to the next with a sap-contaminated blade.
Do not divide a Hosta with suspicious virus symptoms. Persistent mottling, color bleeding along veins, puckering, unusual distortion, or other abnormal patterns may warrant investigation for Hosta Virus X. Cutting a suspicious plant increases the risk of spreading contaminated sap.
Prepare planting holes or containers before disturbing the parent plant. The less time roots spend exposed, the better.
If conditions are dry, water beforehand. Moist soil is easier to work, and a well-hydrated plant is less vulnerable to root disturbance.
Insert a fork or spade outside the main crown and work around the plant gradually. Begin farther from the crown than you think necessary, particularly with a mature specimen, because Hosta roots can extend well beyond the visible shoots.
Loosen the clump from several sides before attempting to lift it.
Raise the clump onto a tarp, board, or clear patch of ground. Large Hostas can be surprisingly heavy, so avoid levering aggressively against the crown.
Shake away or gently tease off enough loose soil to see where the individual shoots and crowns join. There is no need to wash every root completely clean.
Some clumps have relatively loose, fleshy roots and can be teased apart by hand. Dense, fibrous crowns may require a clean, sharp spade or knife.
Whenever possible, separate between growing points rather than cutting directly through them.
Every division should include viable crown tissue, at least one healthy growing point, and a useful portion of roots.
A single-eye division with strong roots can survive and is sometimes used when maximizing propagation numbers, but it is less forgiving and usually takes longer to rebuild. For most gardeners, divisions containing several shoots establish more quickly and produce an attractive clump sooner.
Trim obviously dead or severely damaged roots. If you discover foul-smelling, watery crown tissue or extensive dry brown-to-black decay, stop and investigate disease rather than distributing questionable sections around the garden.
Position each division at approximately the same depth as the original plant. Do not bury the crown beneath several inches of soil.
Water after backfilling to settle soil around the roots and remove large air pockets.
Three things make a viable Hosta division: a healthy growing point + sufficient roots + correct planting depth. A large amount of foliage above ground cannot compensate for a weak crown or badly reduced root system.
Division size determines how quickly the new plant looks substantial.
The smaller you divide a clump, the more plants you can produce – but the longer each one usually needs to rebuild.
| Division Size | Best Use | Tradeoff |
|---|---|---|
| 1 healthy eye with strong roots | Possible when maximizing propagation | Least forgiving and usually slowest to form a substantial clump |
| 2-3 healthy shoots | Good balance between multiplication and establishment | Fewer plants produced from the parent clump |
| 5-6 shoots or more | Fastest return to a mature-looking garden specimen | Only a few divisions obtained |
For most home gardeners, a division with two or three healthy shoots and a substantial root system offers an excellent compromise.
If the purpose is landscape impact rather than producing as many plants as possible, keep the divisions larger.
Large Hostas can develop enormous, heavy crowns. A mature plant such as Hosta ‘Empress Wu’ may eventually spread 5-6 ft., making it unrealistic to handle like a small perennial.
For a giant clump:
divide in early spring if possible, before the foliage expands fully;
dig gradually around the perimeter rather than trying to lever the entire crown out immediately;
use a sturdy, sharp spade for dense crown tissue;
keep substantial divisions if rapid recovery is important;
consider removing only an outer section if you do not need to relocate the whole plant.
A valuable mature specimen does not always need to be completely dismantled simply to obtain another plant.
Miniature and small Hostas are easier to lift but deserve gentle handling because each division contains less stored crown and root tissue.
A cultivar such as Hosta ‘Blue Mouse Ears’ forms a compact clump only about 6 in. tall and roughly 12 in. across, so use smaller tools and avoid unnecessarily chopping through the root mass.
Where natural crown separations are visible, tease them apart rather than cutting indiscriminately.
If a miniature Hosta is container-grown, division is also a good opportunity to inspect the roots, refresh tired potting mix, and check that drainage remains open.
Yes. If a large parent clump is healthy and you want only one or two new plants, an outer section can often be removed while leaving most of the Hosta undisturbed.
This is particularly useful when:
the parent plant is very large;
only a few divisions are needed;
the established Hosta is important to the existing garden design;
lifting the entire clump would disturb nearby plants.
Use a sharp spade to cut vertically around a healthy outer portion. Dig deeply enough to retain a useful root system, lift the section carefully, then fill the resulting gap around the parent plant with good garden soil and water thoroughly.
Replant divisions at approximately the same depth as the original Hosta.
The crown should sit close to soil level, with the bases of the shoots positioned naturally rather than buried deeply. In spring, emerging shoots should remain visible instead of disappearing beneath several inches of soil.
Spread the roots into the planting hole rather than folding them into a tight bundle. Backfill carefully and firm the soil enough to remove major air pockets without compressing it excessively.
Do not bury a weak division deeper to make it feel more secure. Stability comes from properly settled soil and healthy roots, not from covering the crown too deeply.
The first few weeks after division are primarily about water and root establishment, not fertilizer.
Because each new plant has fewer roots than the original clump, it is less able to tolerate drying.
Water thoroughly after planting. This helps settle soil around the roots.
Maintain reliable moisture. Newly divided Hostas should not repeatedly dry out.
Avoid waterlogging. Moist soil is desirable, saturated soil is not.
Protect from severe heat and afternoon sun. A reduced root system may struggle to support large foliage during hot weather.
Mulch lightly. Mulch can conserve moisture, but do not bury the crown under a deep damp layer.
Avoid heavy feeding immediately. Root establishment matters more than forcing rapid leaf production.
Spring divisions need particular attention through their first summer. Fall divisions should remain adequately moist until the plant enters dormancy.
A mature Hosta represents years of accumulated crown and root growth. Dividing it redistributes those reserves among several smaller plants, so a reduction in size afterward is normal.
Recovery speed depends on:
the size of each division;
the amount of healthy root retained;
soil moisture;
weather during establishment;
cultivar vigor;
whether significant foliage was lost after division.
Larger divisions usually return to a mature-looking mound faster. Single-eye or very small divisions may need several growing seasons to regain substantial size.
A smaller first-year clump does not indicate failure if the plant remains healthy and produces normal foliage.
Yes, but flowering is not the easiest time to divide a Hosta.
A flowering plant is supporting mature foliage, flower scapes, and roots simultaneously. Cutting the root system at this stage increases the stress placed on the remaining roots.
If division is unavoidable, work during cool conditions, preserve as much root as possible, replant immediately, and provide attentive aftercare. Spent flower scapes can be removed if necessary.
When division is planned rather than urgent, spring or early fall is generally preferable.
A potted Hosta may eventually fill its container with multiple crowns and a dense root system.
Signs that division or repotting may be useful include:
multiple crowns filling almost the entire surface;
a tightly congested root ball;
very little usable potting mix remaining;
a container that dries unusually quickly;
reduced vigor despite appropriate watering and feeding.
Tip the plant gently from the pot and inspect the root ball.
If the Hosta simply needs more room, moving it into a slightly larger container may be enough. If distinct crowns have become tightly packed, separate them in the same way as a garden-grown Hosta and pot the divisions individually.
Use a moisture-retentive but freely draining potting mix and containers with adequate drainage holes.
Dividing simply because a certain number of years has passed. Healthy Hostas may not need it.
Assuming poor growth means congestion. Drought, roots, pests, disease, or excess sun may be responsible.
Waiting for very hot weather. Large foliage and disturbed roots create unnecessary moisture stress.
Making every division tiny. Small divisions multiply plants quickly but recover more slowly.
Leaving roots exposed. Prepare new planting sites before lifting the Hosta.
Planting the crown too deeply. Replant at approximately the original level.
Allowing new divisions to dry out. Newly disturbed roots need dependable moisture.
Keeping soil saturated. Hostas need moisture, but damaged roots still require oxygen.
Moving from Hosta to Hosta with contaminated cutting tools. Decontaminate equipment between individual plants because Hosta Virus X can spread in sap.
Dividing a suspicious or diseased plant. Diagnose unexplained mottling, crown decay, or abnormal decline before propagation.
Before putting a spade through an established Hosta, work through the decision in order.
| Question | If Yes | If No |
|---|---|---|
| Is there a genuine reason to divide? | Continue to the next question | Leave a healthy Hosta undisturbed |
| Is the plant healthy? | Division can proceed | Diagnose disease or environmental stress first |
| Is the weather favorable for establishment? | Good time to divide | Delay if practical |
| Do you want maximum plant numbers? | Use smaller viable divisions, accepting slower recovery | Keep larger multi-shoot sections for quicker garden impact |
| Are the new planting sites prepared? | Lift and divide the plant | Prepare them before exposing the roots |
Gardenia’s practical rule: Successful Hosta division rests on four decisions: divide only when there is a reason + choose a low-stress time + keep every division biologically strong + replant immediately at the correct depth.
Early spring as new shoots begin to emerge is one of the easiest times to divide Hostas. Early fall is also suitable in many climates, provided divisions have enough time to establish before severe freezing.
Hostas do not need division on a rigid schedule. Healthy clumps can remain undisturbed for many years. Divide when you want more plants, the clump becomes congested, the center declines, the plant outgrows its position, or a container becomes overcrowded.
Yes, but summer division creates more stress because mature leaves lose water rapidly and hot weather can dry disturbed roots. If summer division is necessary, work during cool weather, replant immediately, and keep the root zone consistently moist.
For most gardeners, two or three healthy shoots with a good root system provide an excellent balance between multiplication and recovery. A single-eye division with strong roots can survive but is less forgiving and usually takes longer to form a substantial clump.
Yes. A healthy outer section can be cut from a large established clump with a sharp spade while leaving most of the parent plant intact. Make sure the removed section includes viable crown tissue and a useful root system.
Replant Hosta divisions at approximately the same depth as the parent plant. The crown should remain close to soil level, and emerging spring shoots should not be buried deeply.
Water thoroughly after planting and keep the root zone consistently moist while the divisions establish, without leaving the soil waterlogged. Check moisture regularly, especially during warm or dry weather.
Spring divisions usually need little foliage removal because shoots are still small. When dividing fully leafed Hostas later in the season, remove badly damaged leaves or spent flower stalks if needed but retain healthy foliage where practical.
Yes, but it is not the easiest timing because the plant is supporting substantial active growth. Spring or early fall is preferable when division can be planned, but a flowering Hosta can be divided with careful handling and aftercare.
Division turns one mature crown into several smaller plants. Smaller divisions naturally need time to rebuild. Recovery depends on division size, root retention, moisture, weather, and cultivar vigor.
Consider division when multiple crowns fill the pot, roots are densely congested, little potting mix remains, or the container dries unusually quickly. Some Hostas only need repotting into a larger container rather than division.
Yes. Hosta Virus X can spread in infected sap carried on cutting tools and equipment. Do not divide plants showing suspicious virus symptoms, and decontaminate tools between individual Hostas.
Royal Horticultural Society – How to Grow Hostas
Royal Horticultural Society – Dividing Perennials
Iowa State University Extension – When Is the Best Time to Divide Hostas?
Iowa State University Extension – How to Divide and Transplant Perennials
University of Wisconsin-Madison Extension – Hosta Virus X
Updated: August 2026 • Reviewed by Gardenia Editors
| Hardiness |
3 - 9 |
|---|---|
| Heat Zones |
1 - 8 |
| Climate Zones | 1, 1A, 1B, 2, 2A, 2B, 3, 3A, 3B, 4, 5, 6, 7, 8, 9, 10, 14, 15, 16, 17, 18, 19, 20, 21 |
| Plant Type | Perennials |
| Plant Family | Asparagaceae |
| Genus | Hosta |
| Exposure | Partial Sun, Shade |
| Season of Interest | Spring (Mid, Late), Summer (Early, Mid, Late), Fall |
| Maintenance | Low |
| Water Needs | Average |
| Soil Drainage | Moist but Well-Drained |
| Attracts | Bees, Butterflies, Hummingbirds |
| Landscaping Ideas | Patio And Containers, Small Gardens |
| Garden Styles | City and Courtyard, Gravel and Rock Garden, Informal and Cottage, Pollinator Garden, Woodland Garden |
| Hardiness |
3 - 9 |
|---|---|
| Heat Zones |
1 - 8 |
| Climate Zones | 1, 1A, 1B, 2, 2A, 2B, 3, 3A, 3B, 4, 5, 6, 7, 8, 9, 10, 14, 15, 16, 17, 18, 19, 20, 21 |
| Plant Type | Perennials |
| Plant Family | Asparagaceae |
| Genus | Hosta |
| Exposure | Partial Sun, Shade |
| Season of Interest | Spring (Mid, Late), Summer (Early, Mid, Late), Fall |
| Maintenance | Low |
| Water Needs | Average |
| Soil Drainage | Moist but Well-Drained |
| Attracts | Bees, Butterflies, Hummingbirds |
| Landscaping Ideas | Patio And Containers, Small Gardens |
| Garden Styles | City and Courtyard, Gravel and Rock Garden, Informal and Cottage, Pollinator Garden, Woodland Garden |
Create a membership account to save your garden designs and to view them on any device.
Becoming a contributing member of Gardenia is easy and can be done in just a few minutes. If you provide us with your name, email address and the payment of a modest $25 annual membership fee, you will become a full member, enabling you to design and save up to 25 of your garden design ideas.
Join now and start creating your dream garden!
Create a membership account to save your garden designs and to view them on any device.
Becoming a contributing member of Gardenia is easy and can be done in just a few minutes. If you provide us with your name, email address and the payment of a modest $25 annual membership fee, you will become a full member, enabling you to design and save up to 25 of your garden design ideas.
Join now and start creating your dream garden!