One sedum plant can become a tray of new plants with almost no fuss. Learn how to root sedum leaves, stem cuttings, divisions, and broken pieces, then turn garden trimmings into a colorful, drought-tolerant sedum patch for borders, pots, rock gardens, slopes, and sunny gaps.
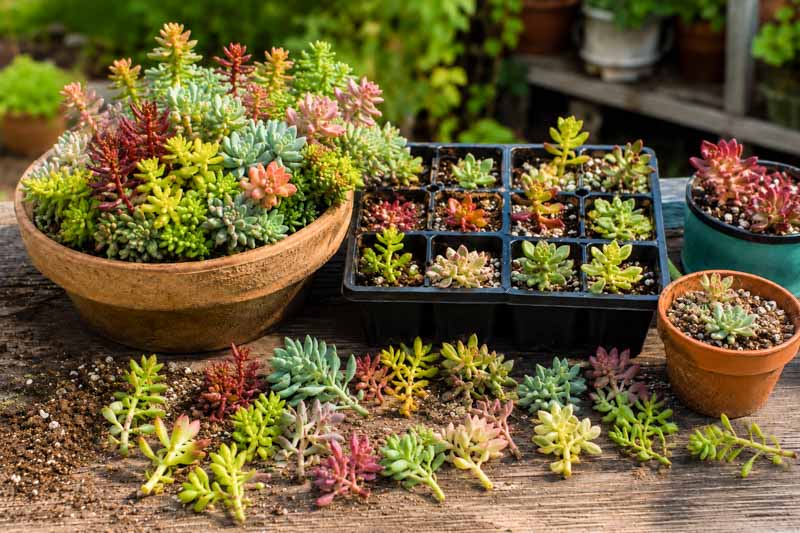
There is a reason gardeners get excited about sedum propagation. Few perennials are this generous, forgiving, and easy to multiply. One healthy stonecrop can become a tray of new plants, a refreshed container, a repaired bare patch, or a colorful ribbon of drought-tolerant ground cover – often from pieces you would normally sweep up and throw away.
Sedum, also called stonecrop, is a succulent perennial with fleshy leaves and stems that store water. That built-in moisture reserve helps cuttings survive while they form roots, which is why sedum is one of the easiest garden plants to propagate. Leaf cuttings, stem cuttings, division, rooted fragments, and garden trimmings can all produce new plants when handled correctly.
The trick is not just taking cuttings. The real trick is matching the propagation method to the kind of sedum you have. A creeping groundcover sedum may root from tiny trimmings. A plump-leaved succulent sedum may grow from individual leaves. A mature upright border sedum is often best divided. Once you understand those differences, one plant can quickly become many.
Quick answer
The fastest way to make many sedum plants is to take 3-4 inch stem cuttings, let the cut ends dry briefly, then insert them into gritty, well-drained mix. Low creeping sedums can also be chopped into trimmings, pressed onto prepared soil, and kept lightly moist until they root.
Sedums are built for survival. Their thick leaves and stems retain water, helping cuttings stay alive while they take root. Many low-growing sedums naturally spread by creeping stems that root where they touch soil. This is why small pieces of creeping sedum often root so readily in gravel, cracks, rock gardens, and sunny bare patches.
This matters because “sedum propagation” is not one single technique. A mat-forming sedum ground cover such as Sedum rupestre ‘Angelina’ or Sedum album ‘Coral Carpet’ behaves differently from upright border types such as ‘Autumn Joy’. Creepers often root from small stem pieces. Upright clumps are usually multiplied by division or leafy stem cuttings.
There is also a useful botanical note. Many plants still commonly sold and searched for as “sedum,” especially taller border stonecrops, are now classified as Hylotelephium. Gardeners still use the word sedum for both groups, so this article uses the practical gardening meaning while explaining which propagation method works best for each habit.
Use this quick guide before you start cutting. It will save time, reduce losses, and help you choose the fastest method for the plant in front of you.
| Sedum Type | Best Propagation Method | Why It Works |
|---|---|---|
| Creeping groundcover sedums | Stem pieces, rooted fragments, trimmings | They naturally root along stems where they touch soil. |
| Upright border sedums | Division or stem cuttings | Mature clumps divide easily and leafy stems root well in active growth. |
| Plump-leaved succulent sedums | Leaf cuttings or stem cuttings | Whole leaves can form tiny plantlets, but stems are usually faster. |
| Old, crowded clumps | Division | Dividing refreshes the plant and gives you instant rooted sections. |
The best time to propagate sedum is spring through early summer, when plants are actively growing and temperatures are warm but not scorching. Stem cuttings root quickly in this window, and divisions recover well. Late summer cuttings can also work, especially in mild climates, but avoid taking cuttings so late that young plants have no time to root before cold, wet weather.
Indoor propagation can be done almost any time if you have bright light, warmth, and a free-draining potting mix. The biggest danger is not dryness – it is rot. Sedums dislike sitting in wet, heavy soil, especially before roots form.
Success rule
Think “barely moist,” not wet. Sedum cuttings need enough moisture to root, but soggy compost can collapse stems before they get started.
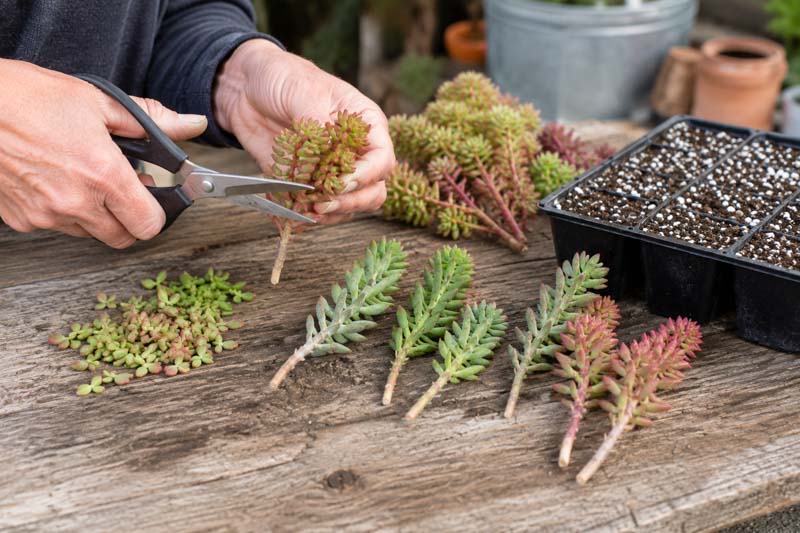
Stem cuttings are the most reliable method for making many sedum plants quickly. This is the best starting point for most gardeners because it works on many creeping, trailing, and upright sedums.
Most sedum stem cuttings begin rooting in 2-4 weeks. You will know they are taking hold when the stems resist a gentle tug and new growth appears. Once rooted, gradually move them into stronger light and plant them where they can grow on.
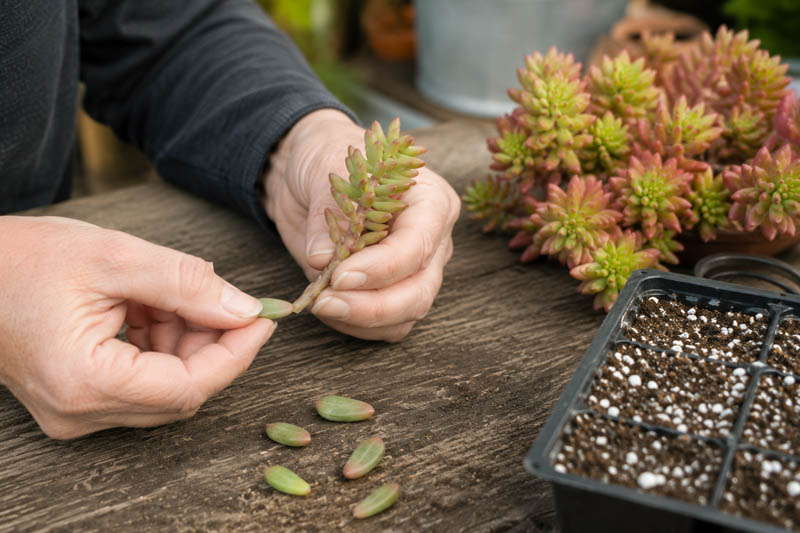
Leaf cuttings are slower than stem cuttings, but they are wonderfully satisfying. This method works best with sedums that have plump, detachable leaves, including many succulent container types. It is less useful for very tiny-leaved mats, where stem pieces are much easier.
Over time, tiny roots and a miniature rosette may appear at the base of the leaf. The original leaf will gradually shrink as it feeds the new plant. Leaf cuttings can take patience, but they are a fun way to multiply special sedums without cutting up the parent plant.
Patience tip
Leaf cuttings are not the fastest route to a full sedum patch. Use them for fun, rare varieties, or small succulent types. Use stem cuttings and trimmings when you want quick coverage.
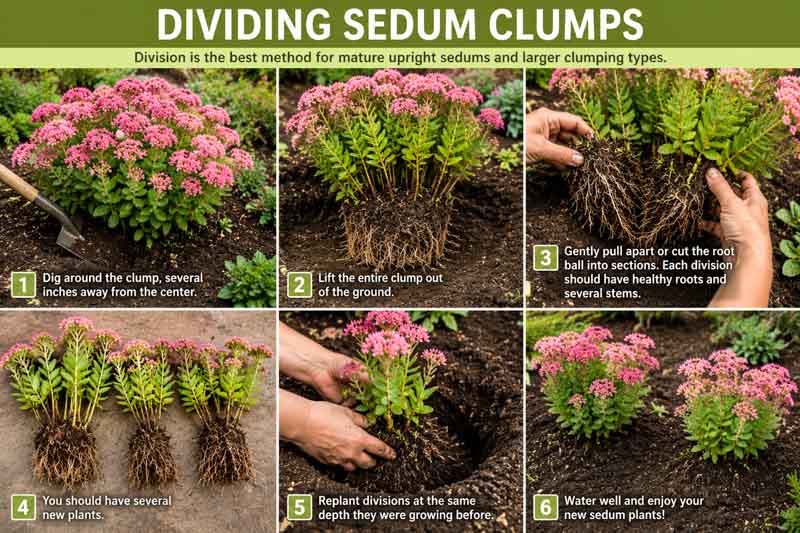
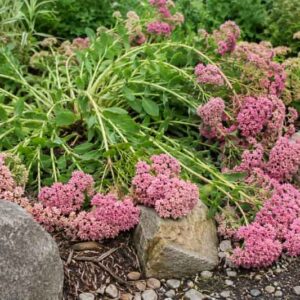
Division is the best method for mature upright sedums and larger clumping types. It gives you instant plants with roots already attached. Divide sedum in spring, just as new shoots emerge, or in early fall in mild regions.
Division is also useful when older sedums become woody, open in the center, or too large for their space. Instead of discarding the extra pieces, replant them in dry borders, sunny slopes, containers, or pollinator-friendly perennial beds.
Every sedum grower eventually discovers this happy accident: a snapped piece often becomes a plant. Creeping sedums are especially good at this. If a section breaks off while you are weeding, edging, planting, trimming, or moving pots, do not waste it.
This is one of the easiest ways to repair gaps in a sedum mat. Simply tuck rooted or unrooted pieces into bare spots, press them against the soil, and keep them just moist until new growth begins.
This is the gardener’s “make 20 plants from one” trick. It works especially well with low-growing, mat-forming sedums such as Sedum acre, Sedum album, Sedum spurium ‘John Creech’, ‘Dragon’s Blood’, and ‘Coral Reef’.
Once the fragments root, reduce watering. In a sunny, well-drained site, many pieces will anchor themselves and begin spreading into a living carpet. A sedum patch may look sparse at first, but it can knit together beautifully by the next growing season.
Patch-making shortcut
Trim a mature sedum mat after flowering, chop the trimmings, and press them into bare soil between stepping stones, along a gravel edge, or on a sunny slope. It is propagation and garden design in one job.
Sedum stem cuttings can sometimes root in water, but soil propagation is usually the better method. Sedums are succulent plants adapted to dry, well-drained conditions. When cuttings sit in water too long, stems may soften or rot, and water-grown roots can struggle when moved into soil.
If you want to try water propagation, use short healthy stem cuttings, remove the lower leaves, and keep only the bare stem in water. Change the water regularly. As soon as small roots appear, move the cutting into gritty potting mix and water carefully while it adjusts.
Best practice
For most sedums, skip the water glass and root cuttings directly in gritty soil. It is more natural for the plant and usually produces sturdier transplants.
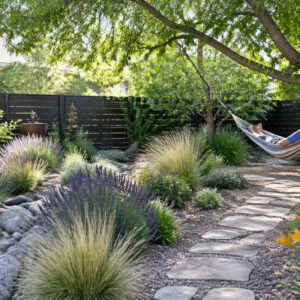
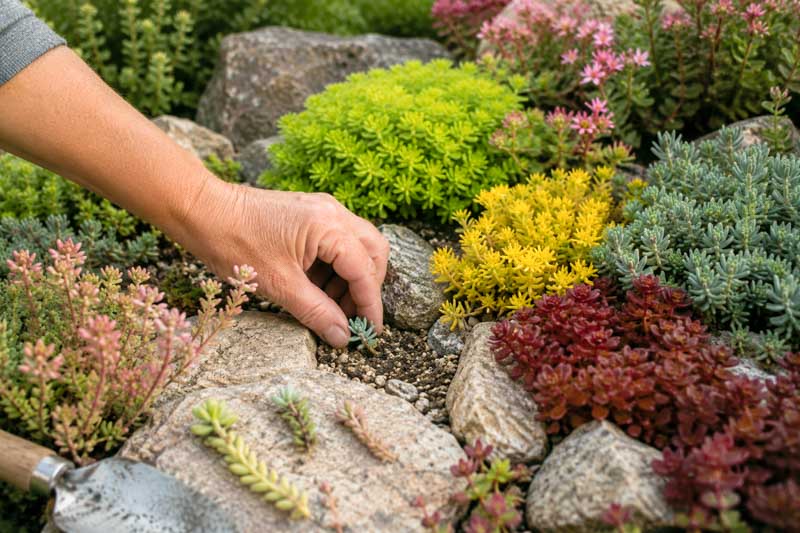
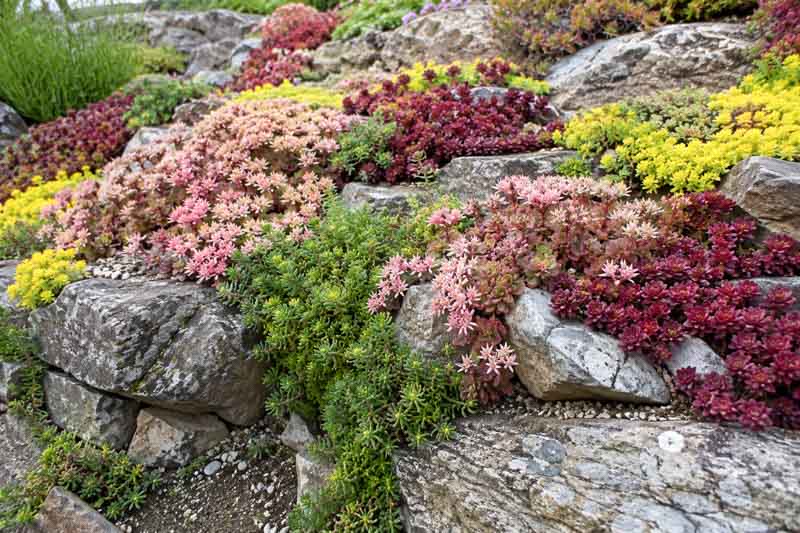
New sedum plants are perfect for rock gardens, gravel gardens, crevice gardens, green roofs, dry slopes, retaining walls, containers, troughs, path edges, sunny banks, and low-water borders. Use the Gardenia sedum comparison page to match varieties by height, spread, hardiness, exposure, and planting place.
For bold color, try golden ‘Angelina’, burgundy ‘Firecracker’, red-toned ‘Red Carpet’, or blue-green ‘Blue Elf’. For compact, refined plantings, try Sedum spathulifolium ‘Cape Blanco’, Sedum dasyphyllum, or Sedum pachyclados.
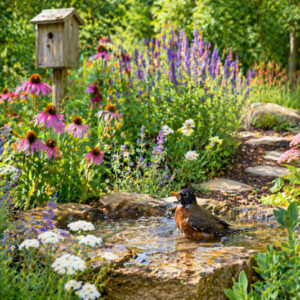
Sedums also combine beautifully with other drought-tolerant plants. For inspiration, explore Gardenia’s sedum plant combinations, especially pairings with Sempervivum, Delosperma, creeping thyme, lavender, and ornamental grasses.
Many gardeners propagate sedum for personal use, especially common species and older varieties. However, some modern named cultivars may be patented, trademarked, or otherwise protected. Propagating protected plants for sale may be restricted without permission from the breeder or rights holder.
If you are rooting sedum cuttings for your own garden, this is rarely an issue with common species. If you plan to sell propagated plants, check the plant label, nursery listing, or breeder information first.
Stem cuttings often root within a few weeks in warm conditions. Small rooted cuttings can usually be potted on or planted out once they show active growth and resist a gentle tug. Leaf cuttings take longer, often several weeks to several months, because they must form a new plantlet from scratch.
A sedum patch made from trimmings may look sparse at first. That is normal. The fragments need time to anchor, root, and branch. By the next growing season, a successful patch can knit together into a colorful carpet, especially if weeds are removed early and the site drains well.
Sedum propagation is one of the easiest ways to stretch a garden budget. With stem cuttings, leaf cuttings, divisions, rooted fragments, and chopped trimmings, one plant can become many. Better yet, those new plants are practical: they cover dry soil, soften stone, spill from pots, brighten gravel gardens, and support low-water planting schemes.
Start with one healthy sedum. Take a few cuttings. Save the broken pieces. Divide the clumps when they mature. Press trimmings into sunny, well-drained soil. Before long, you will understand why gardeners love this plant: sedum does not just grow – it shares itself.
Yes. Sedum is one of the easiest perennials to grow from cuttings. Stem cuttings are the fastest and most reliable method, while some sedums can also be propagated from leaves, divisions, rooted fragments, or trimmings pressed into well-drained soil.
Cut a healthy 3-4 inch stem, remove the lower leaves, let the cut end dry briefly, then insert it into gritty, well-drained potting mix. Keep it in bright light and water lightly until roots form.
Many sedums with plump leaves can grow from leaf cuttings. Remove a whole healthy leaf, let the end callus, lay it on gritty mix, and keep it barely moist. A small plantlet may form at the base of the leaf.
Yes. Broken sedum pieces often root if they are healthy and placed in contact with well-drained soil. This is especially common with creeping sedums that naturally root along their stems.
Yes. Low-growing sedum trimmings can be chopped into small pieces, scattered over prepared soil, pressed down firmly, and kept lightly moist until they root. This works best in sunny, open, well-drained sites.
It is helpful to let sedum cuttings dry briefly before planting, especially thicker succulent stems or leaves. A short callusing period reduces the risk of rot when the cutting is placed in soil.
Sedum stem cuttings often root in 2-4 weeks in warm, bright conditions. Leaf cuttings are slower and may take several weeks or months to produce a visible new plantlet.
The best soil for sedum propagation is gritty, loose, and well drained. Use cactus mix, succulent mix, or potting soil amended with perlite, pumice, coarse sand, or fine gravel.
Sedum cuttings can sometimes root in water, but soil propagation is usually better. Sedums prefer airy, well-drained conditions, and water-rooted cuttings may rot or struggle when moved into soil.
The fastest way to propagate most sedums is by stem cuttings. For creeping groundcover sedums, chopped trimmings pressed onto prepared soil can also create many new plants quickly.
Updated: June 2026 • Reviewed by Gardenia Editors
| Hardiness |
3 - 9 |
|---|---|
| Plant Type | Cactus & Succulents, Perennials |
| Genus | Sedum |
| Exposure | Full Sun, Partial Sun |
| Season of Interest | Spring (Mid, Late), Summer (Early, Mid, Late), Fall |
| Maintenance | Low |
| Soil Drainage | Well-Drained |
| Attracts | Bees, Butterflies, Birds |
Create a membership account to save your garden designs and to view them on any device.
Becoming a contributing member of Gardenia is easy and can be done in just a few minutes. If you provide us with your name, email address and the payment of a modest $25 annual membership fee, you will become a full member, enabling you to design and save up to 25 of your garden design ideas.
Join now and start creating your dream garden!