Need to move a Hosta without losing years of growth? Learn the best time to transplant, how much root to preserve, how deeply to replant, whether to divide at the same time, how to water afterward, and how to distinguish normal transplant stress from a problem that needs attention.



Hostas are remarkably forgiving plants, but moving an established clump is still a major disturbance. The moment you lift a Hosta, some roots are lost, the remaining root system has to reconnect with new soil, and the leaves may suddenly be asked to function with less access to water than they had the day before.
That does not mean transplanting Hostas is difficult. Done at the right time, with the new site prepared in advance and as much healthy root retained as possible, most Hostas establish successfully. The bigger mistake is often not the transplanting technique itself – it is moving the plant into another location with the same problems as the first.
If a Hosta was struggling because of afternoon sun, dry tree roots, poor drainage, wind, or insufficient space, those conditions should be corrected before the plant is moved. A perfectly lifted Hosta can still decline in the wrong destination.
This guide explains when to transplant Hostas, how to move small and giant clumps, how much root to preserve, whether to divide at the same time, how deeply to replant, how to water afterward, and how to distinguish normal transplant stress from a developing problem.
The key to successful Hosta transplanting: prepare the destination first, preserve as much healthy root as practical, and replant immediately at the original depth. The less time the roots spend exposed and the smaller the change in water availability, the easier the transition.
| Question | Best Guidance |
|---|---|
| Best time to transplant | Early spring as shoots emerge is usually easiest; early fall can also work well in suitable climates |
| Can Hostas be moved in summer? | Yes, but fully leafed plants experience greater moisture stress |
| Should you divide while transplanting? | Only if you want more plants, need to reduce the clump, or the crown is genuinely congested |
| How much root should you keep? | As much healthy root mass as reasonably practical |
| Planting depth | Replant at approximately the same depth as before |
| Most important aftercare | Thorough watering followed by consistently moist, not waterlogged, soil |
Early spring is usually the easiest time to move an established Hosta. The pointed shoots are beginning to emerge, but the plant has not yet produced a full canopy of broad leaves. That means less leaf area is losing water while the disturbed root system settles into its new position.
Early fall can also be a good transplanting window in climates where the plant has enough time to establish before severe freezing. Summer heat is fading, and the soil may remain warm enough for roots to continue developing.
Spring offers several practical advantages. The clump is lighter, the crown is visible, and there is less foliage to tear during digging and transport. Cool weather also reduces the demand placed on the root system.
Move the plant after shoots become visible but before the foliage has fully expanded where possible.
Early fall can work well where autumns are long and mild. The key is to transplant early enough that roots have time to settle before the ground freezes or severe winter conditions arrive.
Water fall transplants carefully during dry weather. In colder climates, spring is generally the safer choice if the season is already advanced.
Yes. Sometimes construction, redesign, excessive sun exposure, or another urgent problem makes summer transplanting unavoidable.
The challenge is not that a Hosta suddenly becomes unable to survive. The challenge is water balance. A large canopy may be losing moisture rapidly while the disturbed root system temporarily absorbs less.
If you must move a Hosta during summer:
choose a cool or cloudy day;
avoid the hottest part of the afternoon;
water beforehand if the soil is dry;
prepare the new planting hole before lifting;
keep the rootball shaded and moist;
replant immediately;
monitor soil moisture closely afterward.
Gardenia’s timing rule: Transplant when root establishment can proceed faster than moisture stress develops. That is why cool spring conditions are usually easiest, while early fall can also work well where enough establishment time remains.
A Hosta does not need moving simply because it has occupied the same bed for years. If the plant is healthy, has adequate room, and suits the design, leaving it alone is often the best option.
Good reasons to transplant include:
Too much sun. Brown or scorched margins, fading blue foliage, or chronic heat stress may indicate that a sensitive cultivar needs more protection.
Increasing root competition. As nearby trees and shrubs mature, their roots can take more of the available water.
Poor drainage. A persistently waterlogged position can damage roots and crown tissue.
The plant has outgrown its space. Large Hostas can overwhelm paths, neighboring perennials, or small planting pockets.
The design has changed. Mature Hostas can be moved successfully when beds are redesigned.
The site is too exposed. Broad leaves can be damaged by persistent wind.
A container-grown plant needs moving into the garden. A mature potted Hosta may eventually perform better in open ground.
If the plant is declining for an unclear reason, diagnose the problem before transplanting. Moving a diseased plant or relocating a drought-stressed Hosta into another dry site does not solve the underlying problem.
Use Gardenia’s Hosta Problems: Yellow Leaves, Brown Edges, Holes, Wilting and Poor Growth guide if the reason for decline is uncertain.
The best transplanting technique cannot compensate for a poor destination. Before lifting the Hosta, evaluate the new position carefully.
Gardenia recommends checking five conditions together:
Light. Most Hostas thrive in partial shade to shade, although tolerance varies significantly by cultivar.
Moisture. Hostas prefer dependable root-zone moisture and should not repeatedly dry out.
Drainage. Moist soil must still drain. Moisture-retentive soil is not the same as saturated soil.
Root competition. A deeply shaded position beneath thirsty roots may be more stressful than a brighter site with consistent moisture.
Exposure. Broad Hosta leaves usually perform better where they are protected from strong, drying winds.
Gardenia’s Hosta Site Match: Do not judge a transplant location by shade alone. Evaluate light + moisture + drainage + root competition + exposure. A shaded site can still be unsuitable if the soil is dry beneath tree roots or chronically waterlogged.
Different cultivars illustrate why light should be evaluated rather than treated as a single rule.
Hosta ‘Halcyon’ is valued for its blue foliage, which generally retains its color best with protection from strong sun.
By contrast, fragrant cultivars such as Hosta ‘Fragrant Bouquet’, Hosta ‘Stained Glass’, and Hosta ‘Royal Standard’ can accept relatively brighter conditions when adequate moisture is available.
Hosta ‘Guacamole’ is another example of a fragrant cultivar that can tolerate brighter light than many blue-leaved Hostas when the root zone remains adequately moist.
If the proposed site receives significant sun, compare cultivars in Gardenia’s Hostas Tolerant of Sun guide. Gardeners in warmer regions may also find Hostas for Warmer Climates useful when deciding whether relocation alone will solve a climate-related problem.
Not necessarily. Transplanting and dividing are related operations, but they solve different problems.
Transplanting means moving the plant from one site to another. Division means separating the crown into multiple plants.
If the Hosta is healthy, appropriately sized, and you simply want it somewhere else, preserving the clump intact usually reduces unnecessary disturbance.
Divide during the move when:
you want additional plants;
the clump is genuinely congested;
the center has become sparse or declining;
the parent plant is too large for the new position;
a giant clump is physically impractical to move intact.
If division is required, see Gardenia’s When and How to Divide Hostas Successfully guide for division size, crown handling, step-by-step splitting, and aftercare.
Do not divide simply because the Hosta is already out of the ground. Every additional cut reduces the amount of crown and root tissue remaining with each piece. If the goal is relocation, keeping a healthy clump intact usually gives it more reserves for recovery.
One of the simplest ways to reduce transplant stress is to prepare the destination before the Hosta leaves the ground.
Dig a hole wide enough to accommodate the root system without forcing roots into a tight bundle. The final depth should allow the crown to sit at approximately the same level as it did previously.
If the soil is poor, improve the broader planting area with organic matter rather than creating a tiny pocket of radically different soil. Hostas prefer fertile, moisture-retentive but well-drained conditions.
Water dry soil in the new planting area if necessary before the transplant arrives.
A hydrated plant and moist soil are easier to work with than a wilted Hosta in dry ground. Water beforehand when necessary, but avoid turning the bed into mud.
Push a garden fork or spade into the soil outside the visible crown. Mature Hostas often have roots extending beyond the points where the shoots emerge.
Work around the plant gradually instead of cutting close to the crown immediately.
Ease the soil beneath the plant until the clump can be lifted without excessive force. The objective is not to preserve every fine root – that is rarely possible – but to retain as much functional root mass as reasonably practical.
Use the spade or fork to support the root mass rather than pulling upward on leaves or flower scapes.
Place the Hosta on a tarp, board, or wheelbarrow if it needs to be carried any distance.
Do not leave the rootball sitting in full sun or drying wind while other garden work is completed. Cover or shade exposed roots if the move takes more than a few minutes.
Remove obviously dead material and inspect for unusual crown decay before replanting. Healthy Hosta roots should not be surrounded by foul-smelling, collapsing tissue.
If the plant shows unexplained mottling, vein discoloration, puckering, or other suspicious virus symptoms, avoid cutting or dividing it until the problem has been investigated.
If cutting or division is required, decontaminate tools between individual Hostas because Hosta Virus X can spread in infected sap carried on cutting equipment.
Place the crown so that it sits at roughly the same soil level as before. Do not bury it deeply in an attempt to anchor the plant.
Arrange flexible roots into the planting area rather than folding them tightly beneath the crown.
Return soil around the roots, firming lightly enough to remove major air pockets without compacting the root zone.
Give the plant a deep watering immediately after transplanting. This settles soil around the roots and restores moisture to the disturbed root zone.
Gardenia’s transplant priority: Protect three things during the move – root mass, root moisture, and crown depth. Most avoidable transplant setbacks begin when one of those three is compromised.
As much healthy root as practical.
A transplant succeeds by rebuilding the connection between the crown and the surrounding soil. The more functional roots retained, the greater the plant’s immediate capacity to absorb water.
This does not mean a perfectly intact rootball is required. Hostas tolerate root disturbance well, particularly when moved at favorable times. But there is no advantage in deliberately removing healthy roots simply to make the clump easier to carry.
For very large plants, some root loss is inevitable. Concentrate on preserving a balanced mass of crown and roots rather than leaving an enormous top supported by a severely reduced root system.
Hosta size changes how difficult a transplant is physically, even though the biological principles remain the same.
A compact cultivar such as Hosta ‘Curly Fries’ is relatively easy to lift intact. Use appropriately sized tools and preserve the small root system rather than cutting unnecessarily close to the crown.
Popular medium-sized cultivars such as Hosta ‘June’ are usually manageable as intact clumps if they are not excessively old or congested.
Large cultivars such as Hosta ‘Earth Angel’ or Hosta ‘Liberty’ may require a wider excavation and considerably more lifting effort.
A mature giant such as Hosta ‘Empress Wu’ can spread roughly 5-6 ft., and the crown and root mass may be extremely heavy.
For large and giant Hostas:
move them in early spring if possible;
dig farther from the crown to retain more roots;
loosen the clump progressively from all sides;
use a tarp or wheelbarrow for transport;
ask for help rather than tearing the crown while attempting to lift an unmanageable plant;
divide only if the size of the clump or the intended destination makes division appropriate.
Sometimes taking a substantial outer section is more practical than moving an entire enormous specimen. In that situation, the operation becomes both transplanting and division.
Not automatically.
Healthy foliage continues to photosynthesize and helps support recovery. When Hostas are transplanted in early spring, the leaves may not yet be expanded, so cutting back is usually unnecessary.
When a fully leafed Hosta is moved later in the season, some foliage may become torn, wilted, or damaged. Remove leaves that are badly torn, collapsing, or dying, but there is usually no reason to remove all healthy foliage simply because the plant has been transplanted.
If the plant is flowering, spent flower scapes can be removed if desired so the plant does not continue investing resources in seed production.
Do not confuse reducing stress with removing every leaf. The real priority is restoring water uptake. Preserve healthy foliage where practical and concentrate on root moisture, shade, and establishment.
Replant the Hosta at approximately the same depth it occupied before the move.
The crown should remain near soil level. Planting too deeply can leave the crown buried in persistently damp soil, while positioning the roots too shallowly can increase drying.
Look for the previous soil line on the crown and use it as a guide.
After backfilling, water thoroughly. If soil settles noticeably, check the crown again rather than simply covering everything with more soil.
Water management is the most important part of transplant aftercare.
Immediately after planting, water deeply enough to moisten the entire disturbed root zone. During the following weeks, check the soil rather than watering according to an automatic schedule.
The objective is consistently moist but well-drained soil.
Do not allow the root zone to repeatedly dry out while new roots establish.
Do not keep the plant standing in saturated soil.
Water more frequently during warm, dry, or windy periods.
Water less frequently when cool weather and rainfall keep the soil naturally moist.
Check below mulch before assuming the soil is wet or dry.
A light layer of organic mulch can reduce moisture fluctuations, but keep deep mulch away from the crown itself.
Heavy fertilizing immediately after transplanting is unnecessary and can encourage soft top growth before the root system is fully re-established.
In reasonably fertile soil, dependable moisture and good site conditions matter more during the first stage of recovery.
Organic matter incorporated appropriately into the surrounding soil, together with a light mulch, can improve conditions gradually without forcing rapid growth.
If the soil is genuinely nutrient-poor, feeding can be addressed once the Hosta has begun establishing rather than immediately after major root disturbance.
A transplanted Hosta may not look perfect immediately. Temporary stress is different from transplant failure.
Normal short-term responses can include:
some drooping during warm weather;
a few damaged or yellowing older leaves;
less impressive growth during the first season;
a smaller mound the following spring if significant roots were lost.
What matters is the direction of change. A plant that stabilizes and then produces healthy growth is recovering.
More concerning signs include:
progressive collapse despite appropriate soil moisture;
foul-smelling, soft crown tissue;
persistent waterlogging;
severe scorch because the new position is too exposed;
continued decline rather than gradual stabilization.
Gardenia’s recovery check: Do not judge transplant success by whether every old leaf remains perfect. Ask whether the crown remains sound, moisture is appropriate, and subsequent growth is healthy.
Transplanting is often prompted by light problems, but “shade” and “sun” are not simple categories.
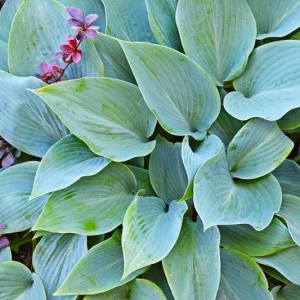
Blue-leaved Hostas generally retain their characteristic coloring best with more protection from strong sun. Hosta ‘Halcyon’ is a useful example of a blue cultivar whose foliage is especially valuable in cooler, shaded situations.
Many gold, chartreuse, or fragrant Hostas accept brighter conditions when soil moisture is dependable. Hosta ‘Stained Glass’, Hosta ‘Fragrant Bouquet’, Hosta ‘Royal Standard’, and Hosta ‘Guacamole’ illustrate that range.
If you are moving a Hosta because of scorch, pay attention not only to total hours of light but also to when the sun reaches the plant. Gentle morning sun is very different from intense late-afternoon exposure in a hot climate.
And remember: sun tolerance is not drought tolerance. A cultivar that accepts brighter light may still require dependable root-zone moisture.
A Hosta beneath a mature tree may appear to have plenty of shade yet still struggle because the tree’s roots intercept water before the Hosta can use it.
If a previously vigorous clump has become smaller as the surrounding tree canopy matured, root competition may be part of the problem.
Moving the Hosta to another position beneath equally competitive roots may produce exactly the same result.
When choosing a new site, assess both overhead shade and underground competition. A position with a little more light but less aggressive root competition can sometimes support better Hosta growth than apparently perfect deep shade beneath a thirsty tree.
Moving a container-grown Hosta into the ground is generally easier than relocating a mature garden specimen because the root system is already contained.
Water the pot if the rootball is dry, slide the plant out carefully, and inspect the roots.
If roots circle densely around the outside, loosen them gently before planting. If the container contains several heavily congested crowns, decide whether the plant should be divided or transplanted intact.
Plant at the same crown depth, water thoroughly, and monitor moisture closely during the first growing season.
A compact cultivar such as Hosta ‘Curly Fries’ or a medium-sized cultivar such as Hosta ‘June’ can often be handled intact with little difficulty, provided the root system has not become severely congested.
Moving the plant without fixing the original problem. A dry Hosta moved to another dry site will still struggle.
Digging the destination after lifting the Hosta. Exposed roots lose moisture unnecessarily.
Cutting too close to the crown. Preserve as much useful root mass as practical.
Dividing automatically. Relocation does not require division.
Transplanting during extreme heat when the move can wait. Hot weather increases moisture stress.
Planting too deeply. Keep the crown at approximately its former level.
Letting the root zone dry during establishment. Newly disturbed roots need dependable moisture.
Keeping the soil saturated. Moisture and waterlogging are not the same thing.
Fertilizing heavily immediately after the move. Establishment matters more than forcing new top growth.
Assuming every wilted leaf means failure. Evaluate crown health, soil moisture, and subsequent growth.
Using contaminated cutting tools between Hostas. If cutting or division is necessary, decontaminate tools because Hosta Virus X can spread in infected sap.
Before moving an established Hosta, work through these questions in order:
| Question | What It Changes |
|---|---|
| Why am I moving this Hosta? | Identifies what the new site must correct |
| Does the new site match its light, moisture, drainage, root competition, and exposure needs? | Prevents repeating the original problem |
| Is this a low-stress time to move it? | Reduces moisture imbalance |
| Can I preserve most of the healthy root system? | Improves immediate water uptake |
| Is the new planting hole already prepared? | Minimizes the time roots remain exposed |
| Does this Hosta actually need division? | Avoids unnecessary additional stress |
| Can I keep the root zone reliably moist afterward? | Supports establishment |
Gardenia’s practical rule: A successful Hosta transplant starts before the spade enters the ground. Correct the site problem + choose a low-stress time + preserve roots + maintain crown depth + control moisture during recovery.
Early spring as shoots begin to emerge is usually the easiest time to transplant Hostas because leaf stress is low and cool conditions favor establishment. Early fall can also work well in climates where plants have enough time to establish before severe freezing.
Yes, but fully leafed Hostas experience greater moisture stress during hot weather. If summer transplanting is unavoidable, choose cool or cloudy conditions, prepare the new hole first, preserve as much root as possible, replant immediately, and monitor moisture closely.
Not automatically. If the Hosta is healthy and the goal is simply relocation, keeping the clump intact reduces unnecessary disturbance. Divide only when you want more plants, need a smaller clump, or the crown is genuinely congested.
Replant the Hosta at approximately the same depth as before. Keep the crown near soil level rather than burying it deeply, and spread the roots naturally into the planting hole.
Retain as much healthy root mass as reasonably practical. Some root loss is inevitable when moving an established plant, but preserving more functional roots improves the plant’s immediate ability to absorb water.
Not automatically. Healthy leaves continue photosynthesizing and supporting recovery. Remove badly torn, collapsing, or dying foliage if needed, but spring transplants usually require little or no foliage removal.
Water thoroughly immediately after transplanting, then keep the root zone consistently moist but not waterlogged while new roots establish. Frequency depends on temperature, rainfall, soil, mulch, and exposure, so check the soil rather than following a rigid schedule.
Recovery varies with season, root loss, plant size, weather, and aftercare. Temporary drooping or reduced growth can occur, especially after summer moves. Judge recovery by crown health and subsequent healthy growth rather than expecting every old leaf to remain perfect.
Heavy fertilizer immediately after transplanting is unnecessary. Dependable moisture and good site conditions matter more while the root system re-establishes. Address fertility later if the soil genuinely requires feeding.
Move giant Hostas in early spring when possible, dig well outside the crown, preserve a substantial root mass, loosen the plant gradually from all sides, and use a tarp or wheelbarrow for transport. Divide only if the plant is too large to move intact or you want additional plants.
Yes, if excess light is the cause. However, evaluate moisture, drainage, root competition, and exposure as well as shade. A darker site beneath highly competitive tree roots may still be unsuitable.
Transplant early enough that roots have time to settle before severe freezing. The exact deadline varies by climate, so late-season transplanting is riskier in cold regions. If winter is imminent, spring is usually the safer choice.
Moving an intact Hosta does not itself spread Hosta Virus X, but cutting or dividing infected plants can transfer contaminated sap on tools. If cutting is necessary, decontaminate equipment between individual Hostas.
Royal Horticultural Society – How to Grow Hostas
Royal Horticultural Society – Dividing Perennials
Iowa State University Extension – When Is the Best Time to Divide Hostas?
Iowa State University Extension – How to Divide and Transplant Perennials
University of Wisconsin-Madison Extension – Hosta Virus X
Updated: August 2026 • Reviewed by Gardenia Editors
| Hardiness |
3 - 9 |
|---|---|
| Heat Zones |
1 - 8 |
| Climate Zones | 1, 1A, 1B, 2, 2A, 2B, 3, 3A, 3B, 4, 5, 6, 7, 8, 9, 10, 14, 15, 16, 17, 18, 19, 20, 21 |
| Plant Type | Perennials |
| Plant Family | Asparagaceae |
| Genus | Hosta |
| Exposure | Partial Sun, Shade |
| Season of Interest | Spring (Mid, Late), Summer (Early, Mid, Late), Fall |
| Maintenance | Low |
| Water Needs | Average |
| Soil Drainage | Moist but Well-Drained |
| Attracts | Bees, Butterflies, Hummingbirds |
| Landscaping Ideas | Patio And Containers, Small Gardens |
| Garden Styles | City and Courtyard, Gravel and Rock Garden, Informal and Cottage, Pollinator Garden, Woodland Garden |
| Hardiness |
3 - 9 |
|---|---|
| Heat Zones |
1 - 8 |
| Climate Zones | 1, 1A, 1B, 2, 2A, 2B, 3, 3A, 3B, 4, 5, 6, 7, 8, 9, 10, 14, 15, 16, 17, 18, 19, 20, 21 |
| Plant Type | Perennials |
| Plant Family | Asparagaceae |
| Genus | Hosta |
| Exposure | Partial Sun, Shade |
| Season of Interest | Spring (Mid, Late), Summer (Early, Mid, Late), Fall |
| Maintenance | Low |
| Water Needs | Average |
| Soil Drainage | Moist but Well-Drained |
| Attracts | Bees, Butterflies, Hummingbirds |
| Landscaping Ideas | Patio And Containers, Small Gardens |
| Garden Styles | City and Courtyard, Gravel and Rock Garden, Informal and Cottage, Pollinator Garden, Woodland Garden |
Create a membership account to save your garden designs and to view them on any device.
Becoming a contributing member of Gardenia is easy and can be done in just a few minutes. If you provide us with your name, email address and the payment of a modest $25 annual membership fee, you will become a full member, enabling you to design and save up to 25 of your garden design ideas.
Join now and start creating your dream garden!
Create a membership account to save your garden designs and to view them on any device.
Becoming a contributing member of Gardenia is easy and can be done in just a few minutes. If you provide us with your name, email address and the payment of a modest $25 annual membership fee, you will become a full member, enabling you to design and save up to 25 of your garden design ideas.
Join now and start creating your dream garden!